Create add-on shelves
Creating an add-on wall shelf is almost exactly the same as creating a standard wall shelf, only the designation for the base assembly and back panel assembly is different.
Overview

- Overview
- Example add-on shelf
- Connect add-on bay with basic bay
- Alternative to the production of an add-on rack
For information on how to read in assemblies, see Section definition.
Example add-on shelf
- Now read in the following socket assembly: S1647CA
- Example Explanation:
- S16 = base assembly height 16 cm
- 47 = depth 47 cm
- C = AM:100 cm
- A = Attachment
- Example Explanation:
- Next, please read in the following module: GL1624CA
- Now follow the shelf assemblies; please enter for this purpose:
- MB147C | Parameter: vo=0.5/0.9 [ENTER]
- MB137C | Parameter: vo=1.3/1.7 [ENTER]
This completes the second cut and it should look like the picture on the right.
- Now select the entire add-on wall shelf and create a new group.
Connect add-on bay with basic bay
- Click on the add-on wall shelf, you should now see two green dots (coupling points).
- Click on the left green dot.
- Now move the add-on shelf to the right-hand pillar of the standard shelf, you should see a green dot.
- Now move the add-on shelf exactly to the green point
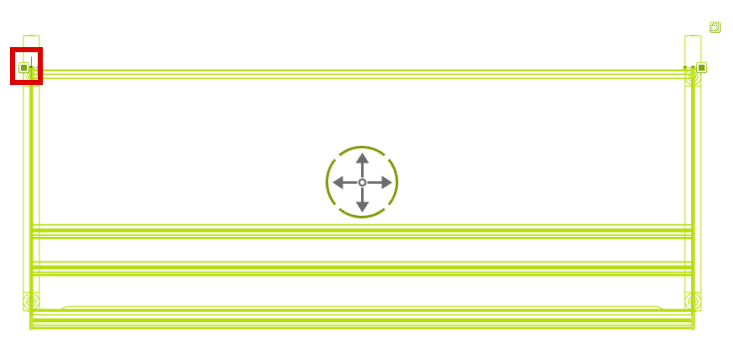
The coupling points have been specially designed to ensure easier positioning of the cuts. Coupling points consist of two points. The green point is referred to as the "insertion point" and the round green point as the "connection point".
Alternative to the production of an add-on rack
Another way to create the add-on shelf is to use the previously created standard shelf as a template. To do this, first create a copy of the standard shelf.
Select the copy and click on the green cube to be able to work within the group.
- Highlight the left column and press [DEL].
- Mark the left foot part and press [DEL].
- Click outside the group to get out of the group
- Select shelf and click on Create group, change group name to "Add-on shelf"