Image rendering
Preparation
The following describes how to render a realistic image.
For a realistic representation of light, it is recommended to use a 360° HDRI image. All light information is stored in these images.
These HDRI images can be found and downloaded free of charge at the following link: https://polyhaven.com/hdris
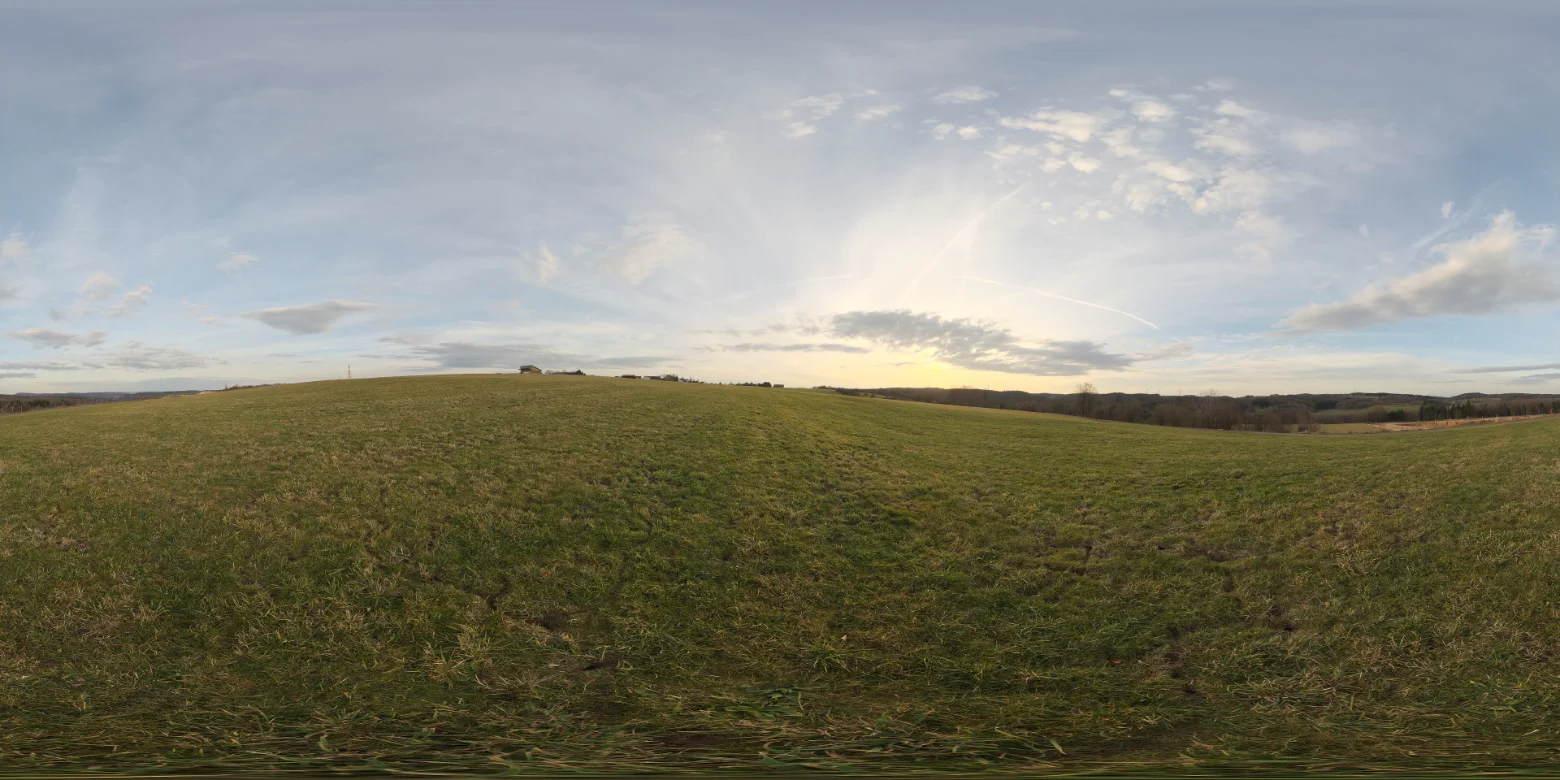
There are a large number of HDRI images on this website that are suitable for rendering. The following image was used in this example.
HDRI images can have a very large file size. This is due to the fact that the light information is stored in uncompressed form. For a good to very good result, a resolution of 4k or 8k is recommended
HDRI images can have a very large file size. This is due to the fact that the light information is stored in uncompressed form. For a good to very good result, a resolution of 4k or 8k is recommended
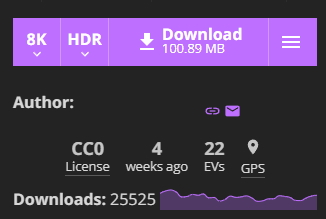
To download the desired image, go to the top right of the website, where you can select the resolution and the file format. In this example, the resolution 8k and the file format HDR have been selected.
Include HDRI image in visual-Store
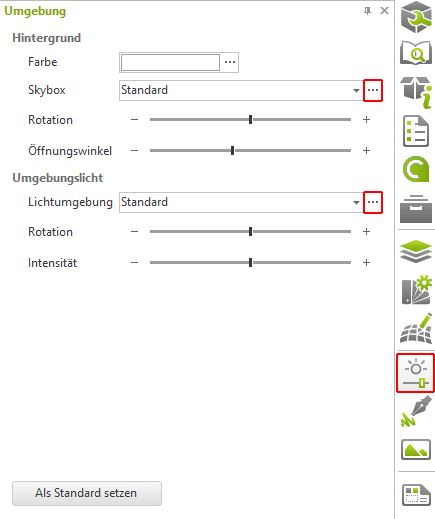
To use the downloaded image in visual-Store, click on the Environment button in the toolbar on the right. The loading time of the HDRI image depends on the file size and resolution.
After the HDRI image has been loaded, the real-time light display of your design will change; this is only a rough preview of how the light will ultimately appear in your design.
You can now optionally set the rotation and intensity in the environment setting.
In this example, the light intensity has been set to 150 in order to get more light into the planning.
To make the illumination of the room even more realistic, you can also set additional photometric light sources. These have a more natural light distribution.
It is always advisable to carry out test renderings at a lower resolution before you render the final image. This is just so that you can quickly see how the light will look in your design.
Render the image
Once you have made all the necessary settings, the final image can now be rendered. To do this, go to Presentation in the top tab and click on Image.

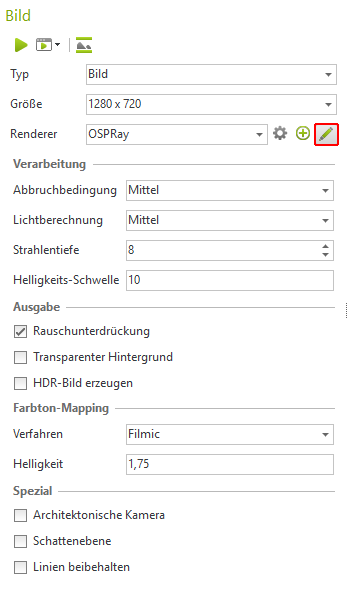
In the render window that opens, you can now set the resolution and renderer.
In this example, a resolution of 1280 x 720 has been selected. Please use the OSPRay renderer as the renderer.
To make the following settings, click on the pencil next to the renderers.
- Processing.
- Termination condition: Medium
- Light calculation: Medium
- Beam depth: 8
This is particularly useful when rendering glass, otherwise a value of 6 is sufficient. - Brightness threshold: 10
- Hue Mapping:
- Process: Filmic
- Brightness: 1.75
The brightness under color tone mapping was adjusted after the rendering, as the image still appeared a little too dark. This step can be carried out at any time and is independent of the rendering.
Results
Here you can see a few examples of images that were rendered with the settings made previously.
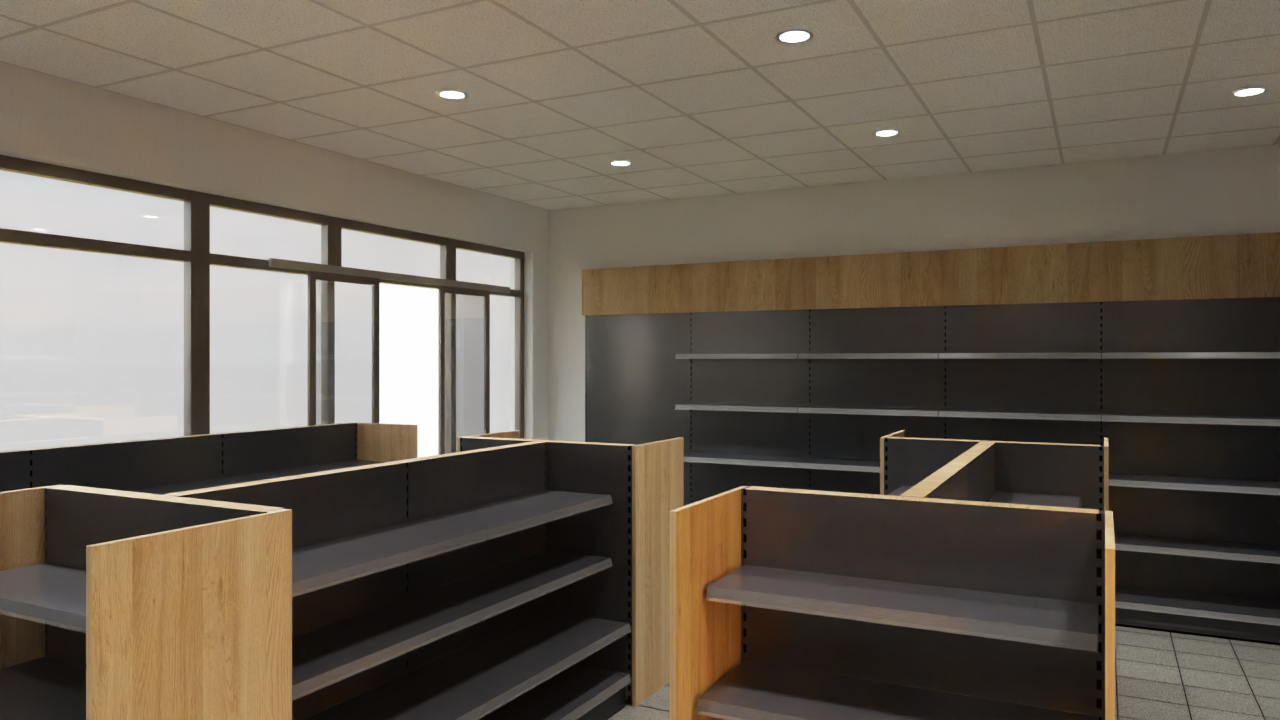
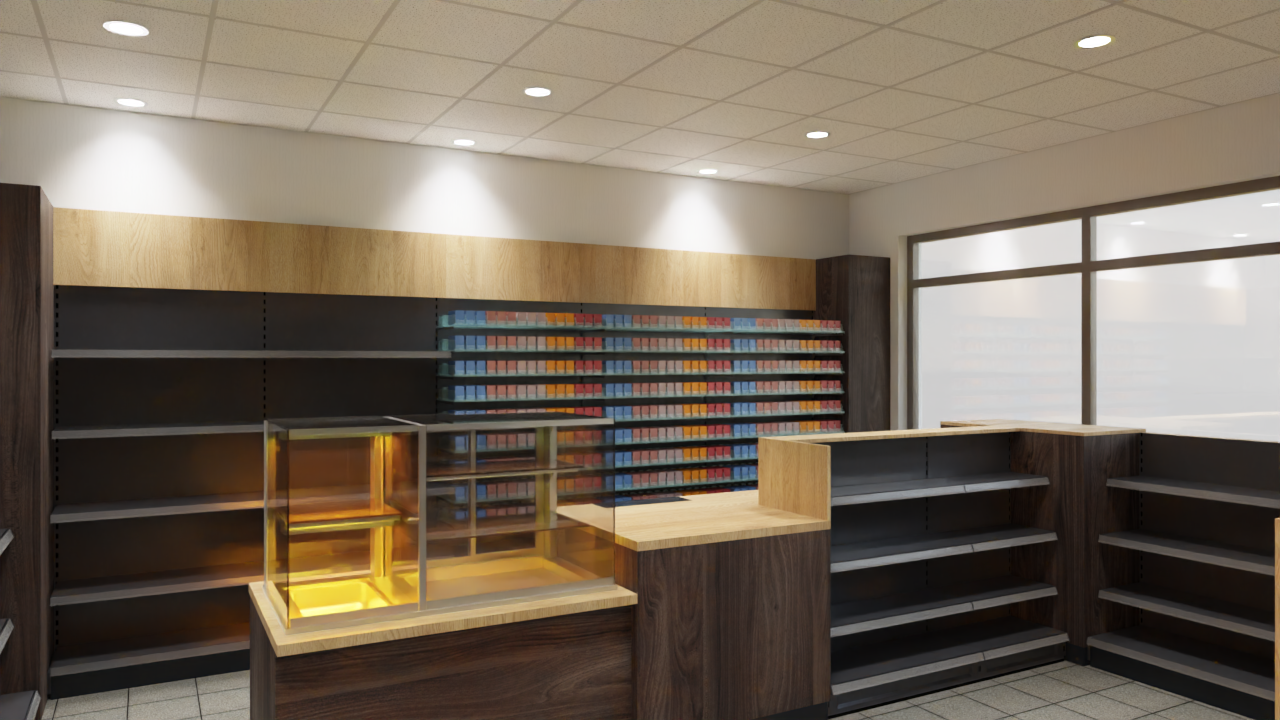
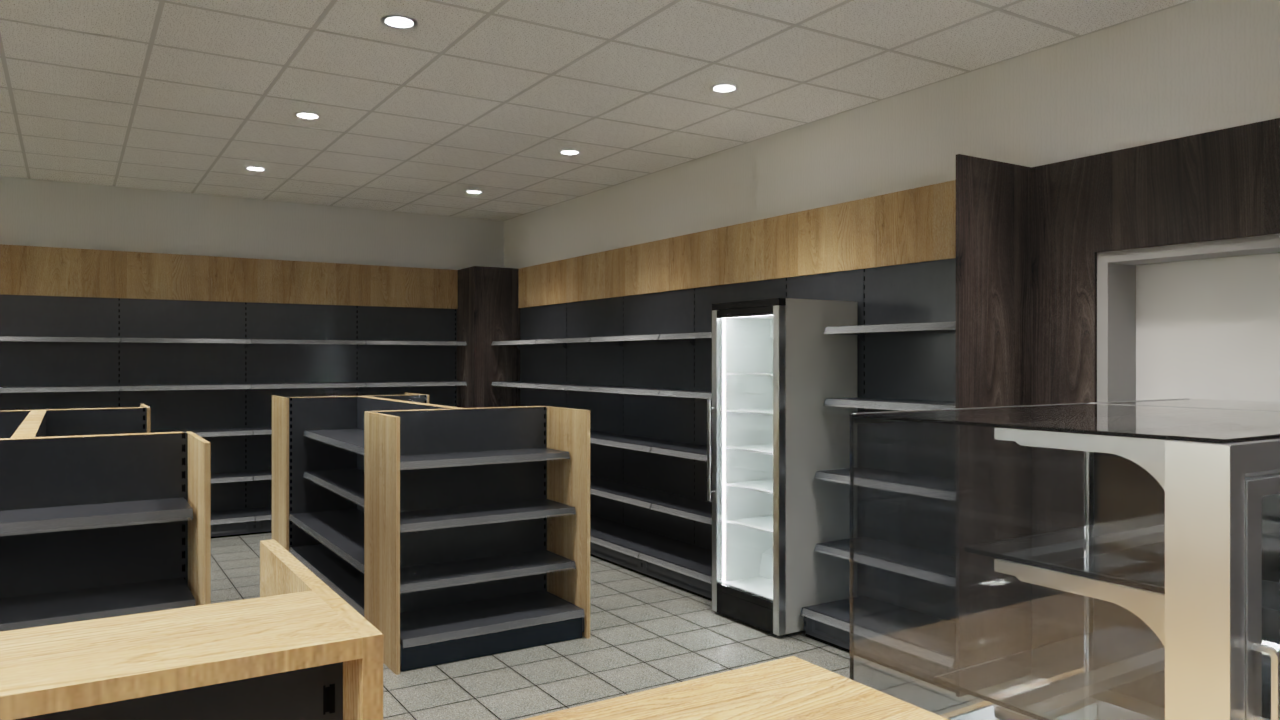
During the rendering process, the image is smoothed in the meantime. To shorten the rendering time, you can run the renderer two or three more times after the first smoothing and then cancel the rendering. This is because the details of the image are only slightly improved after it has been smoothed.