Room dimensioning
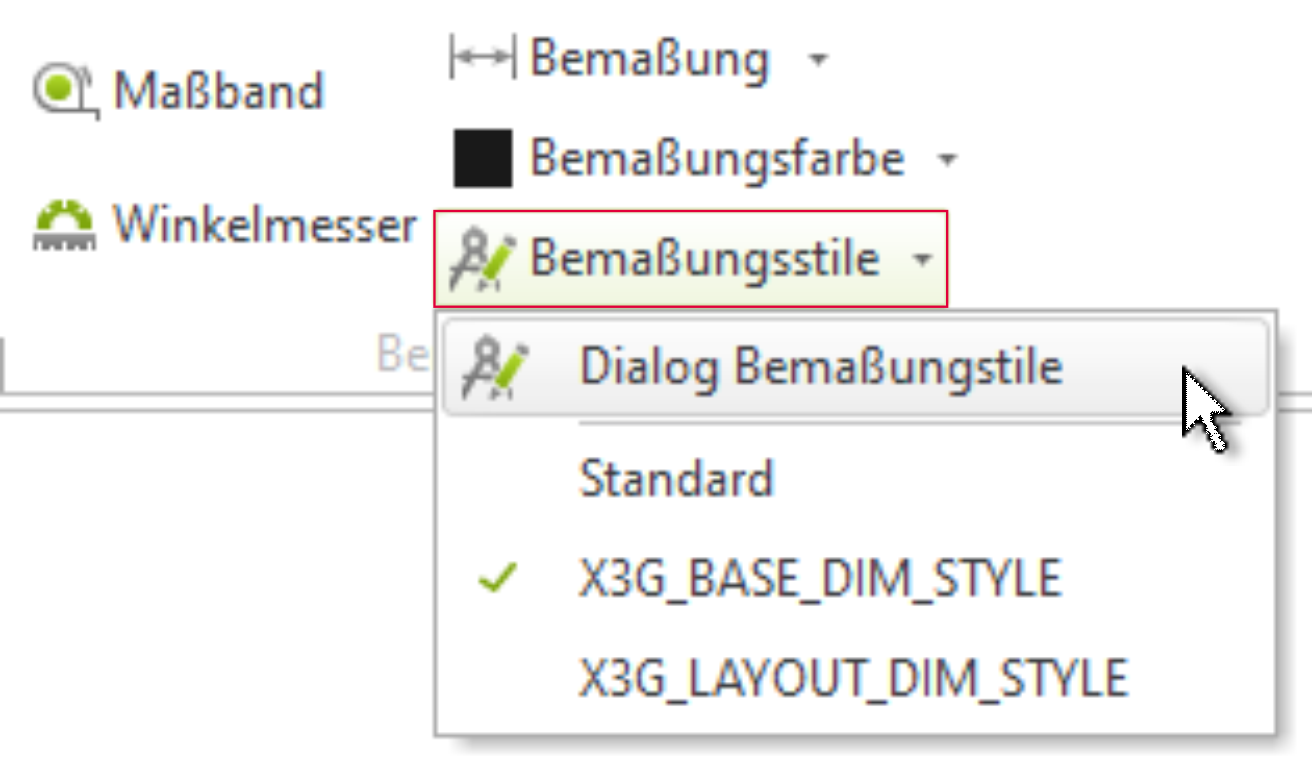
Before you start dimensioning the room, you should take a look at the dimensioning styles. You can make settings for the dimensioning in the Edit tab (Dimensioning group).
Dimensioning styles
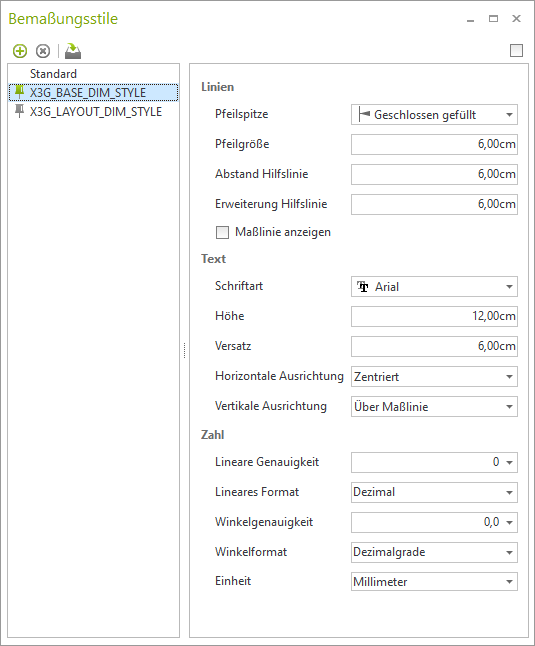
The dialog window for dimensioning styles offers various setting options. You can adapt the preset dimensioning style to your requirements or create a new dimensioning style.
The dialog always provides three styles:
- Standard
- X3G_DEFAULT_DIM_STYLE
- X3G_LAYOUT_DIM_STYLE
The style is displayed independently of the loaded DWG file. If you open a file that uses a different style, this is automatically displayed in the dialog and can be changed accordingly.
Dimensioning styles can be changed using the dialog:
- be edited in their properties
- be newly created
- be removed
- be set as standard
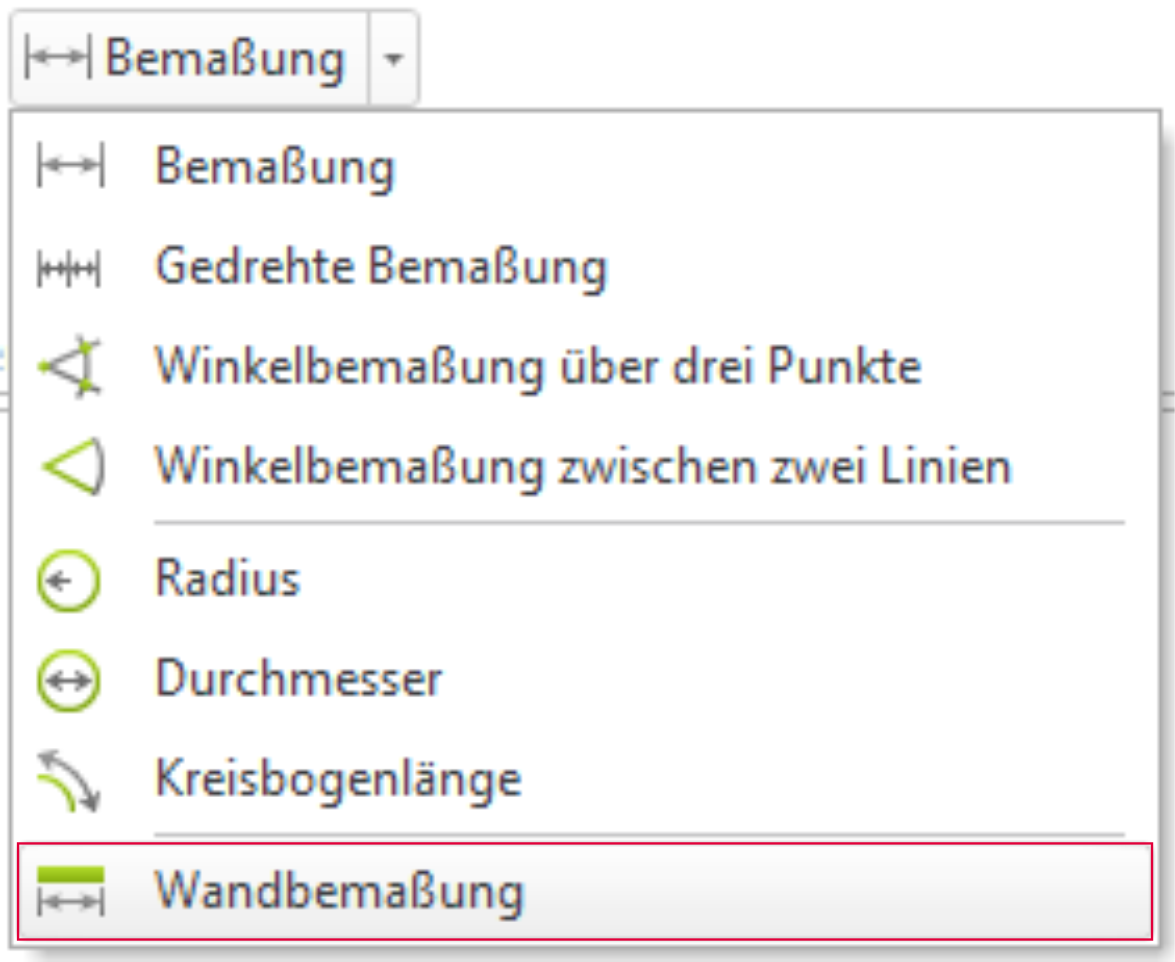
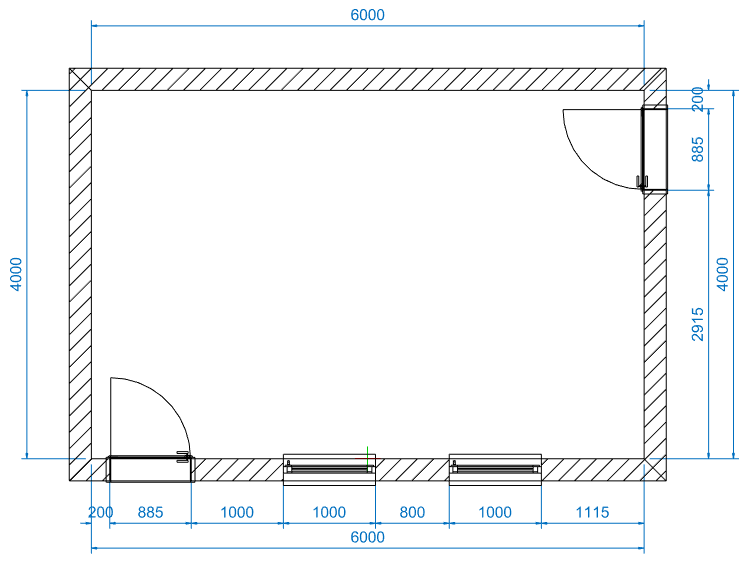
Apply dimensioning
Once all settings have been made, select the wall dimensioning in the Dimensioning group under Dimensioning and click on one of the inner edges of the room to be measured. You can now use the mouse to define the position and distance of the dimensions from the wall.
Once the first wall has been measured, you can automatically measure all other walls, including doors and windows, by simply clicking with the mouse. The position and distance of the first dimension chain are transferred to all other walls.