Goods placement POS
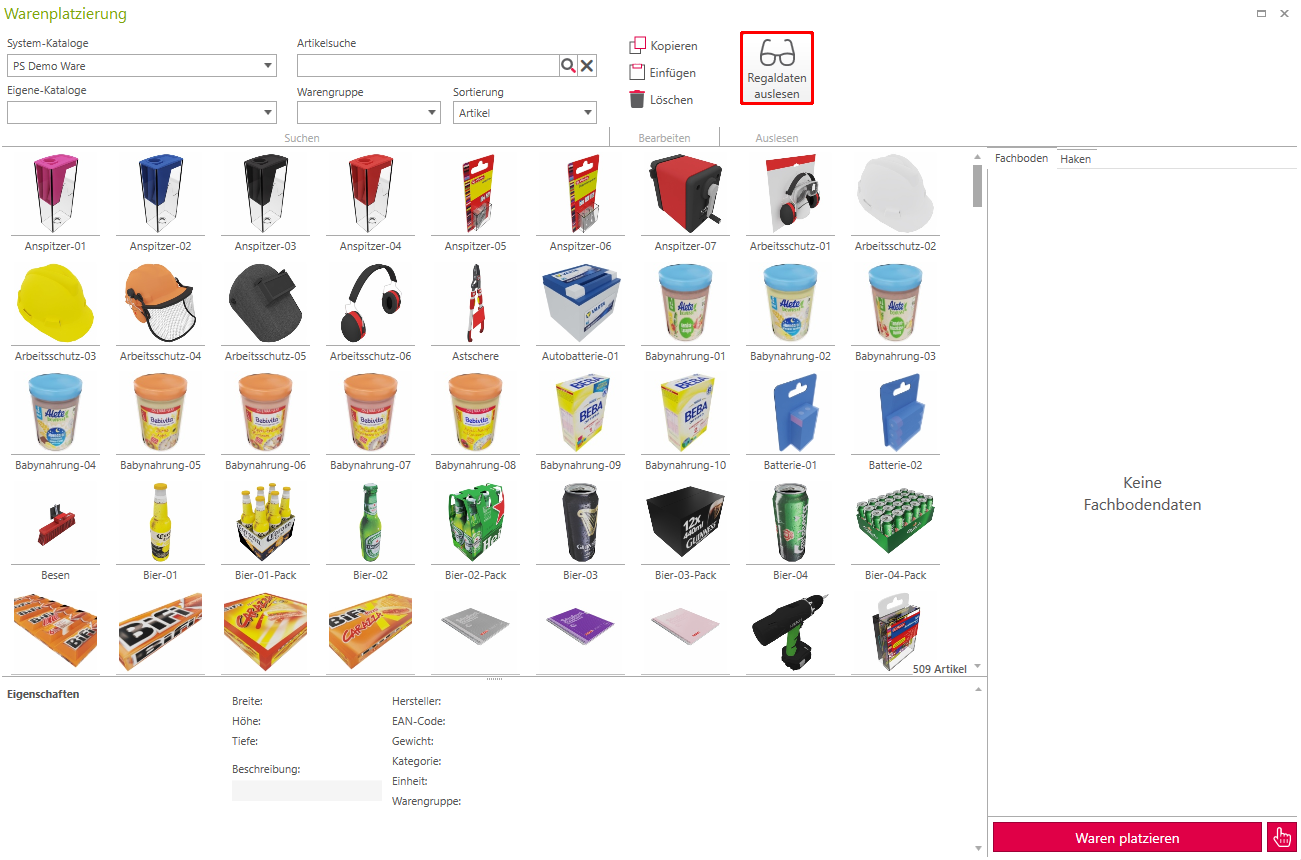
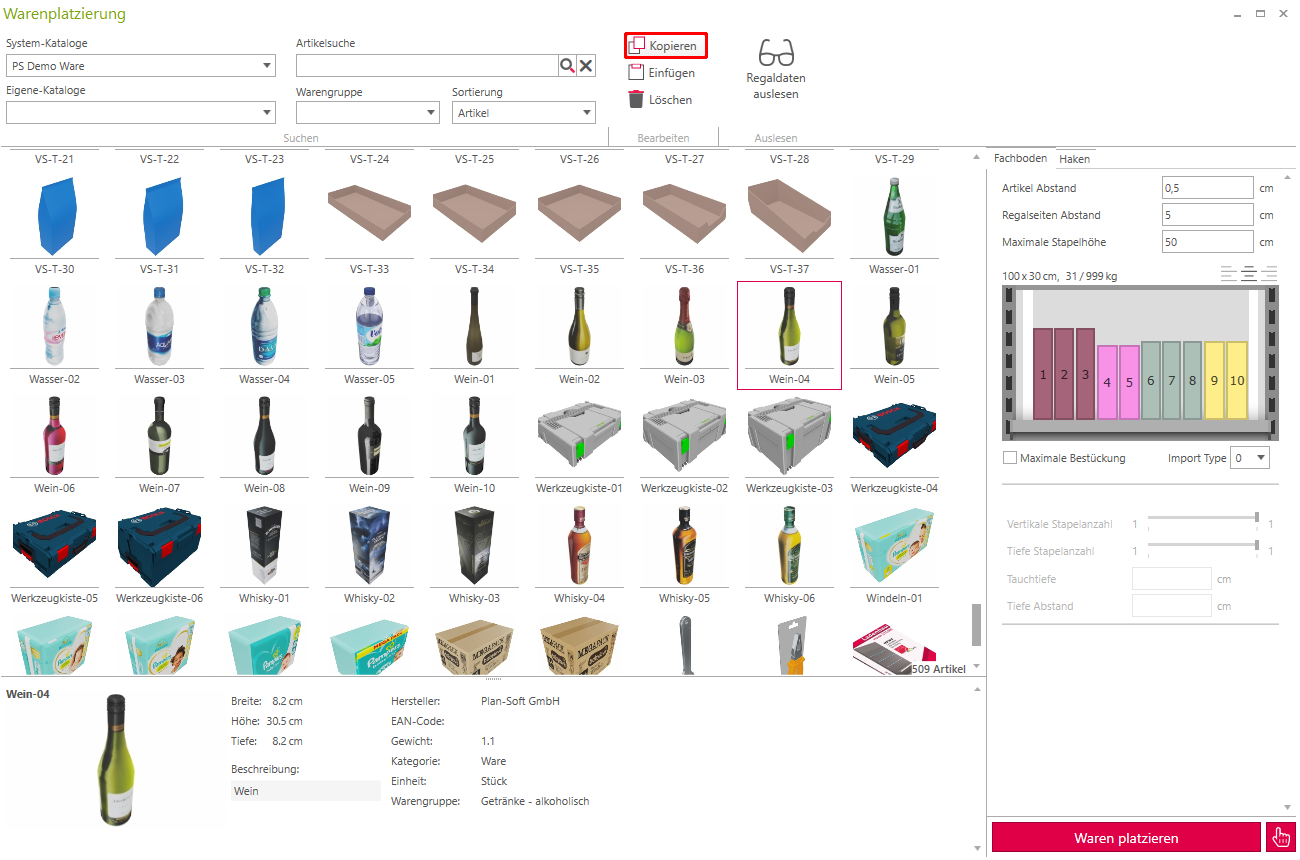
Overview goods placement
- Catalog selection: Already integrated or specially created catalogs can be called up here.
- Article search: By entering the search, the searched articles are displayed. By means of the product group, you can filter for individual, specific product groups such as electronics.
- Read out shelf data: If a shelf or hook is selected, the shelf will be read into the goods placement. Without this step, no shelf or hook can be loaded.
- Shelf actions:
- Copy: A complete shelf can be copied here.
- Paste: A previously copied shelf can be pasted here.
- Delete: The goods from the shelf are deleted.
- Preview image: Shows the respective shelf and its goods after clicking on the Read shelf data button.
- Goods overview: A preview for all goods is displayed here.
- Goods placement: When placement is complete, this automatically places the goods on the shelf or hook.
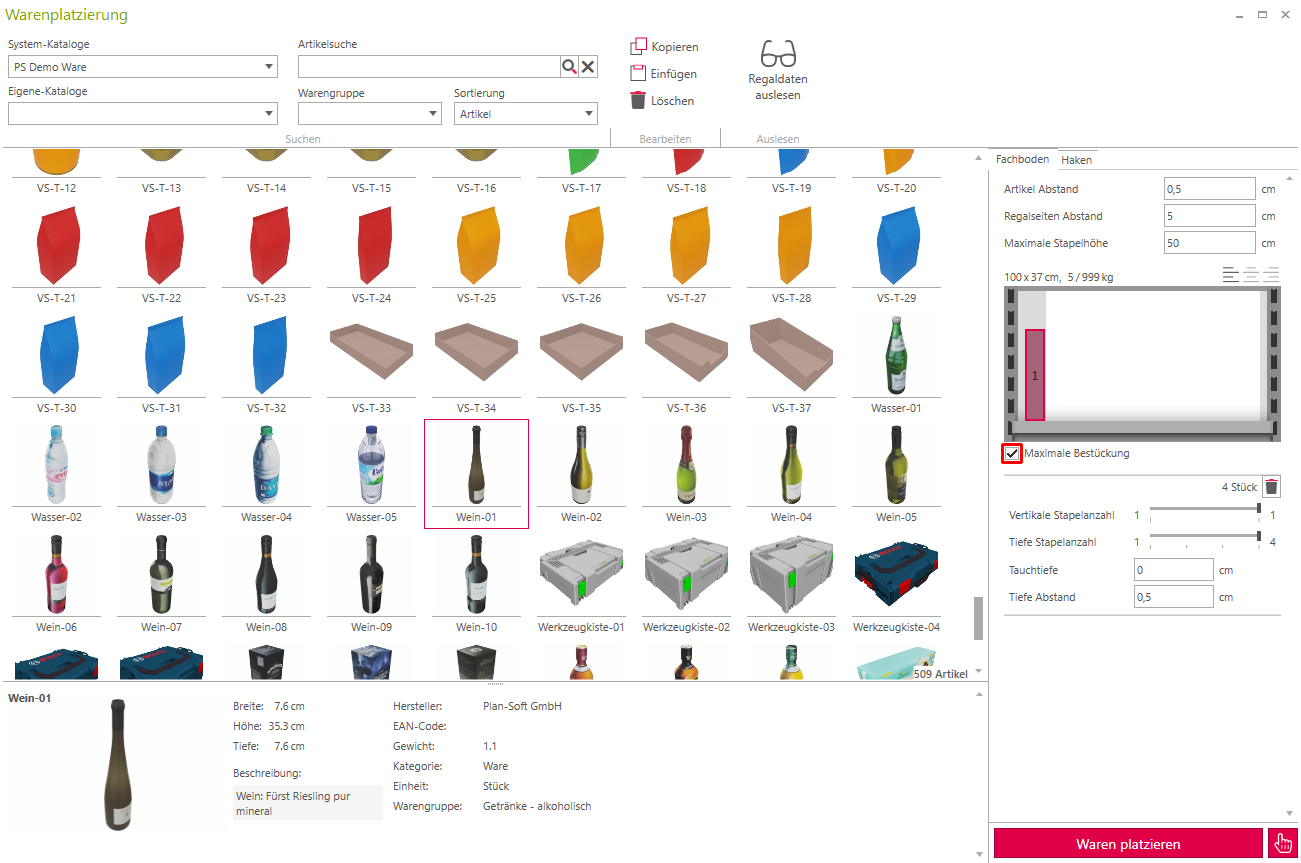
- Shelf settings:
- Item spacing: The spacing between the items is set here. (Standard: 0.5 cm)
- Shelf side distance: Specifies the side distance of the goods to the shelf. (Default: 0 cm)
- Maximum stacking height: define how far items can be stacked on the shelf. (Default: height of the shelf).
- Article settings:
- Vertical stack count: How many times the selected item should be stacked on top of each other.
- Depth stack count: How many times the selected item should be lined up one after the other.
- Immersion depth: Specifies how far an object can merge into the same object when stacking.
- Plunge distance: Here you can control the distance between the respective objects.
- Item properties: Displays properties of the respective item.
The goods are edited in a preview. All changes will be applied only after clicking Place goods.
Add goods
The following steps are carried out to add goods to the shelf:
1. selection of the shelf:
To start loading, a shelf is selected first. Double-click on the desired shelf to start stocking. In the Goods presentation tab, select the item Goods placement, whereupon the window for placement opens.
2. read out shelf data:
Once the shelf has been selected, the shelf can be imported by clicking on Read shelf data.
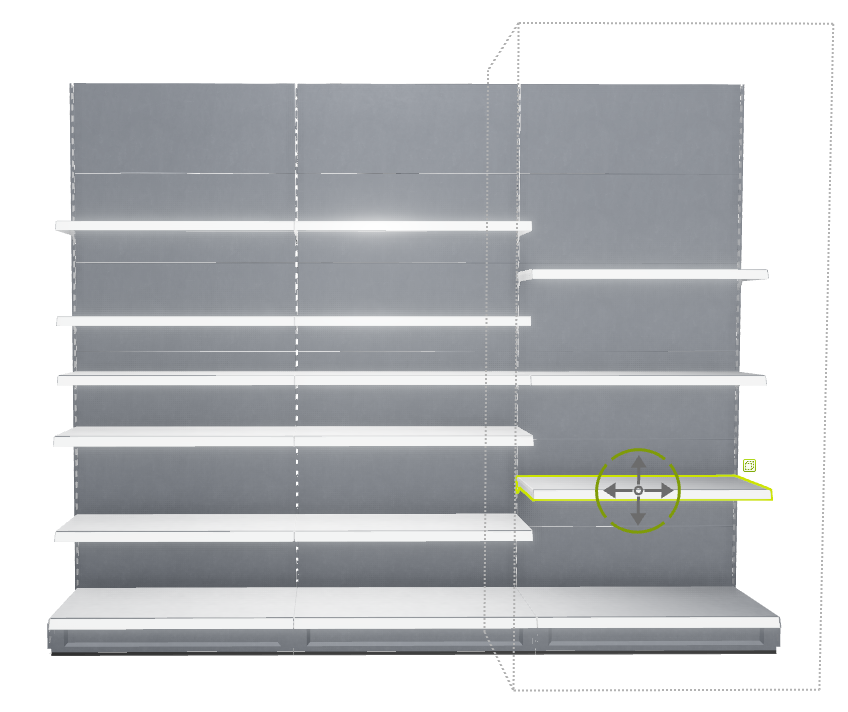
3. Stocking the shelf:
The selected object can now be dragged and dropped onto the shelf. The rectangle shown indicates the respective object. If you select it by left-clicking, you can make further adjustments.
Load shelf to maximum:
If you select the maximum load option beforehand, the entire shelf will be filled to the maximum with the goods.
You can now place as many different products as you like on the shelf. As soon as it is fully stocked, the program prevents placement.
Adjust stack count
Once the object has been selected, the number of objects stacked on top of each other can be adjusted using the Vertical stack count slider. The Depth number of stacks slider shows how many times an object can be stacked to the rear. The respective slider can be set to the maximum that the goods cannot protrude beyond the shelf or the rear wall of the rack. However, this is only possible if the maximum stacking height has not been changed beforehand. This is set optimally from the start. If this is not the case, the goods will continue to be stacked above the shelf.
In this example, the cans can be stacked a maximum of twice on top of each other and 3 times in a row, otherwise they exceed the shelf or are in the rear wall.
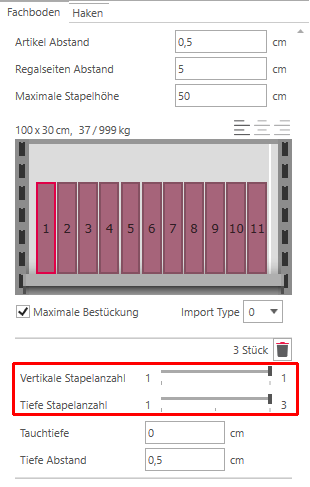
By changing the value in Import Type, you can rotate the selected item on the shelf.
Delete an object
To delete an object, select it by clicking on the rectangle and remove it bypressing the [DEL] key or by clicking on the trash can.
4. place the goods:
By pressing the Place goods button, the goods are now placed on the shelf.
Copying a shelf
To copy a shelf completely, steps 1 and 2 must be followed first. Once this has been done, the entire shelf can be copied by clicking the Copy button.
Now select the shelf to which you want to transfer the current one. To do this, follow steps 1 and 2 again. The copied shelf can now be inserted by clicking on the Paste button.