Hook goods placement
The following steps are carried out to add goods to the hook:
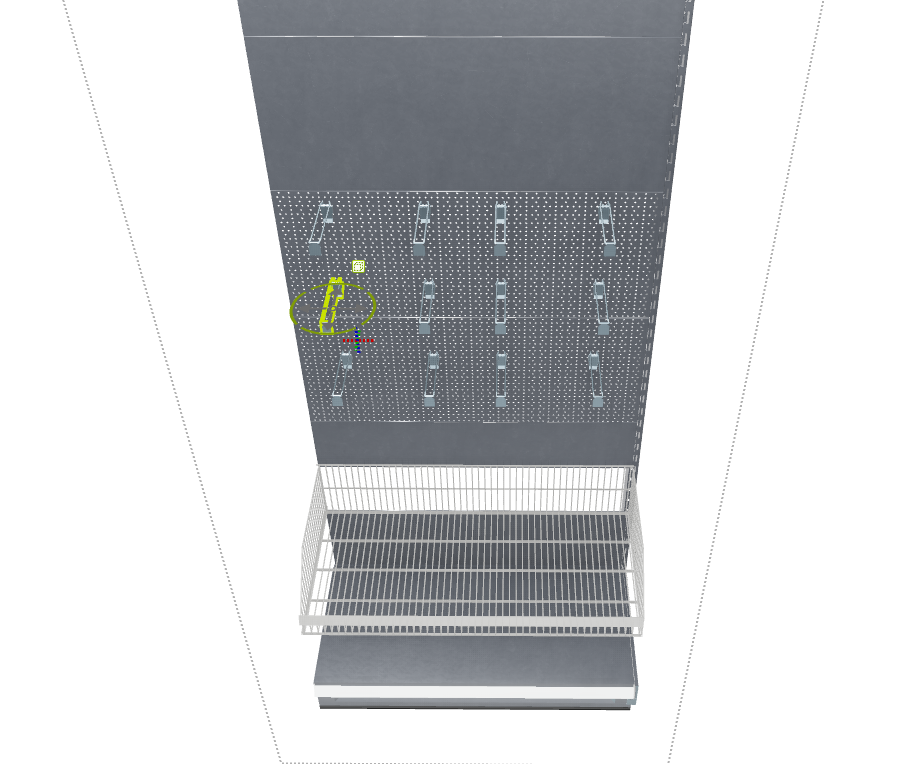
1. selection of the hook:
To fill the hooks, first select the shelf. Double-click on the desired hook to start stocking. In the Shopfitting tab, select the item Merchandise placement, whereupon the window for stocking opens.

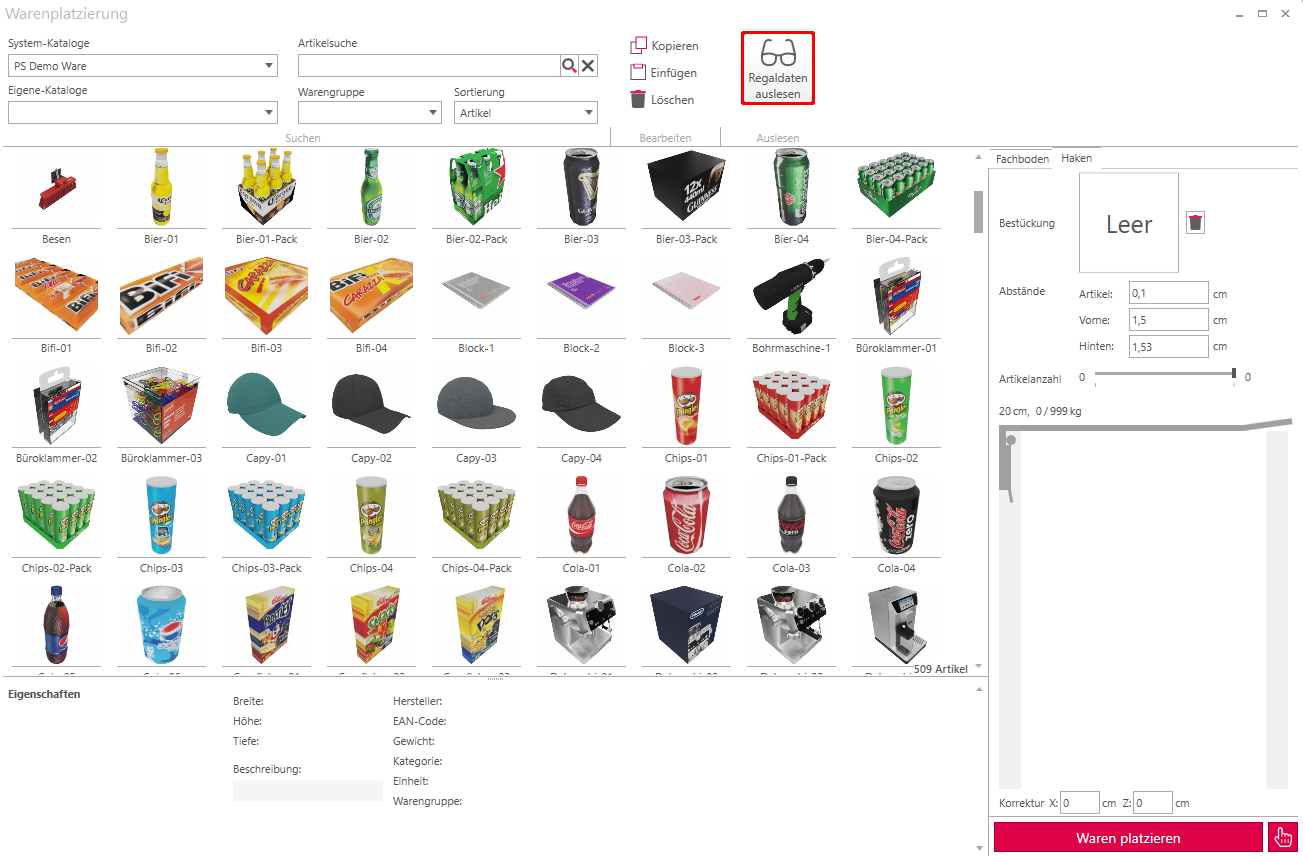
2. read out shelf data:
If the tick is selected, the tick can be imported by clicking on Read shelf data.
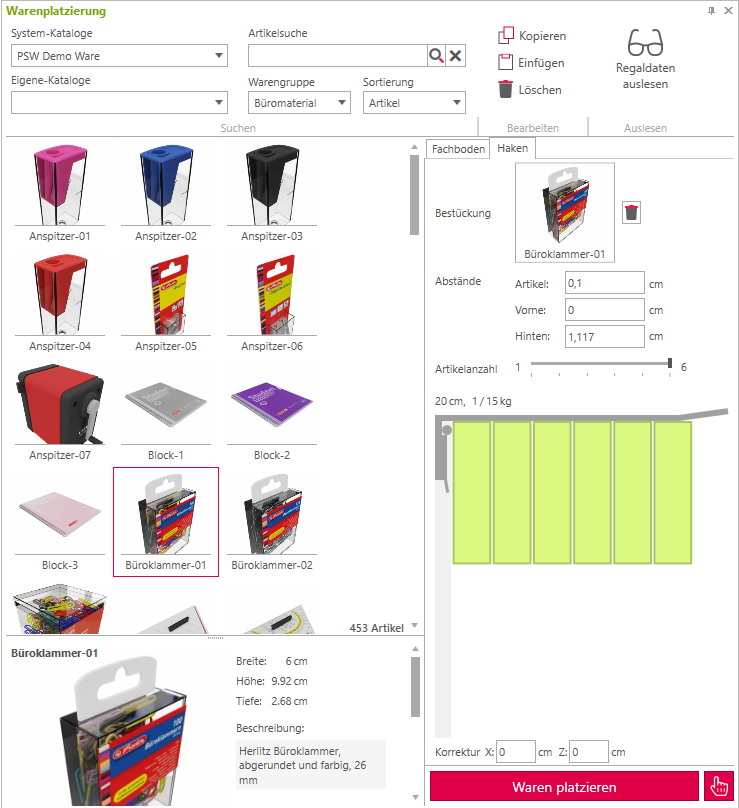
3. place goods:
Now the selected object can be dragged and dropped onto the hook. The entire hook is automatically populated with the object.
Adjustment of the goods on the hook
The spacing can be used to further individualize the goods on the hook.
Article: regulates the spacing between articles.
Front: Distance between the product and the front end of the hook.
At the back: Distance of the goods from the shelf.
The number of items slider controls the number of items on the hook. It can be set to a maximum so that the goods do not protrude beyond the hook. In this example, the item can be stacked a maximum of 6 times next to each other, otherwise it will exceed the hook.
Delete an object
To delete an object, select it by clicking on the rectangle and remove it bypressing the [DEL] key or by clicking on the trash can.
4. place the goods:
By pressing the Place goods button, the goods are now placed on the shelf.