Swap colors
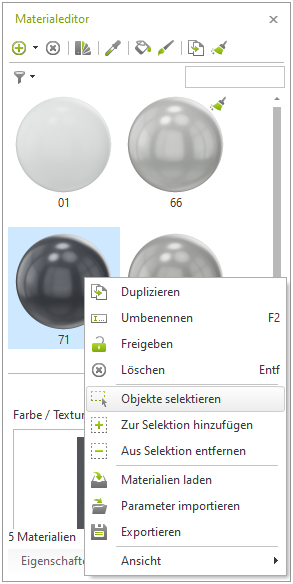
Material exchange using the material editor
The material exchange using the material editor is only done graphically. The changed materials will not appear in the parts list for articles.
Exchange material on selected objects
- Mark objects on which the material is to be exchanged
- In the material editor, select (click) the new material
- click on the paint bucket in the symbol page of the material editor
- Right-click with the mouse on any position in the planning, select Replace material
- Left-click with the mouse on a place of the marked objects, which is provided with the old material
- The old material is thus replaced
Exchange a material in the complete planning
- Right-click on the material to be replaced in the material editor, select objects, select, continue with step 2 of the above procedure
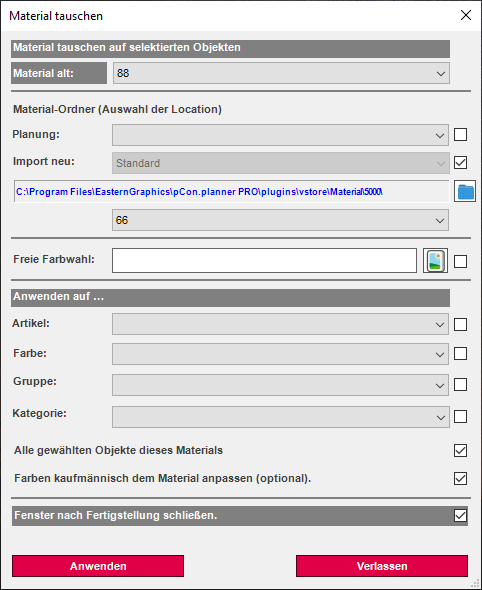
Shopfitting function "Swap material"
In the Shopfitting area there is the Swap material function. This is a tool to change colors both graphically and commercially on objects.
- Mark objects in planning
- Click on the Swap material function
- Selection of the old material
- Selection of the new material
- Select the setting to which the material swap is to be applied
- Select the Adjust colors commercially option if you want the new material to appear in the bill of materials.
- Click Apply when all the desired settings have been made
- The material is exchanged according to the settings