Textures and articles
To convert existing 3D articles to another article for placement, please proceed as follows:
Overview
Texture exchange
To replace the texture of an existing item, please proceed as follows:
Duplicate the existing material
- Right-click on the material to be duplicated
- In the context menu that opens, select Duplicate
- Rename duplicated material

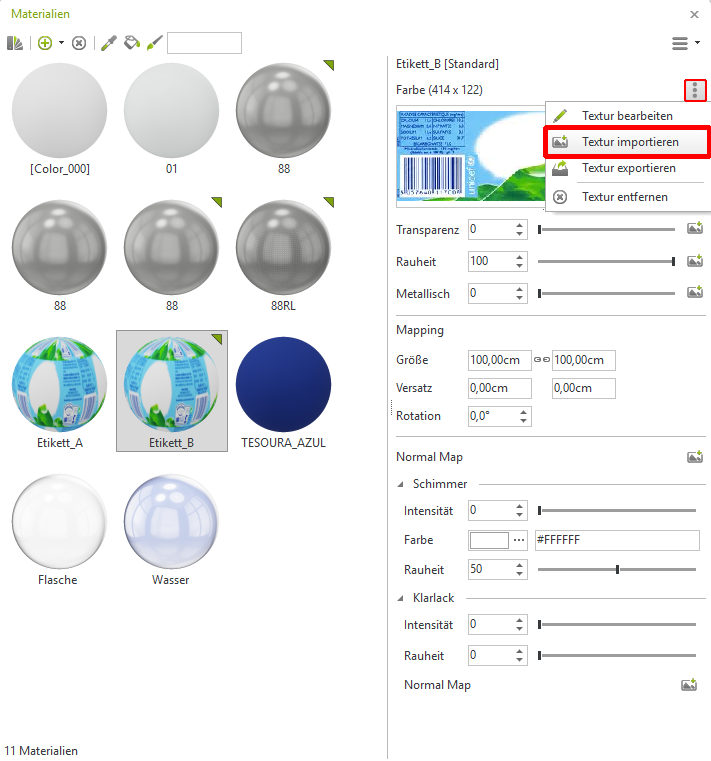
Export and edit the texture
- In the material editor, you will see a preview image of your selected texture. Click on the three dots to the right above it. In the context menu that opens, you will find the button to export the texture.
- Click on it to open the save dialog for saving the graphic
- You can then edit the saved graphic in a graphics program of your choice (Photoshop, Paint.net, Gimp etc.)
- When editing or replacing the graphic, it is very important that the new graphic is in exactly the same position as the original graphic so that it is later displayed correctly in the planning program

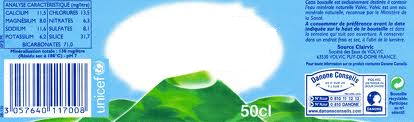
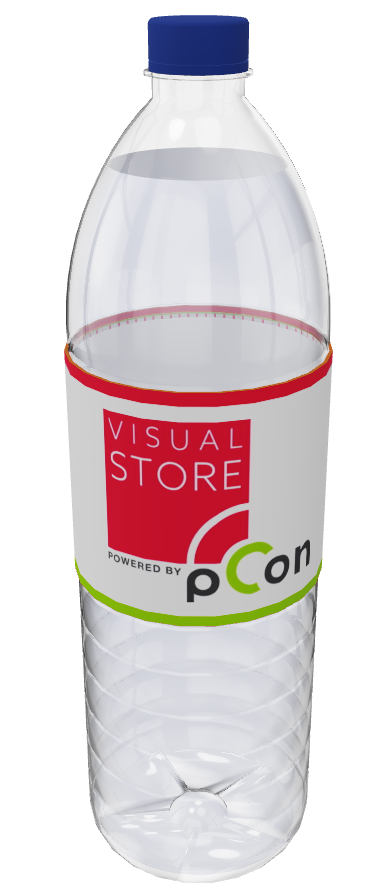
Exported texture:
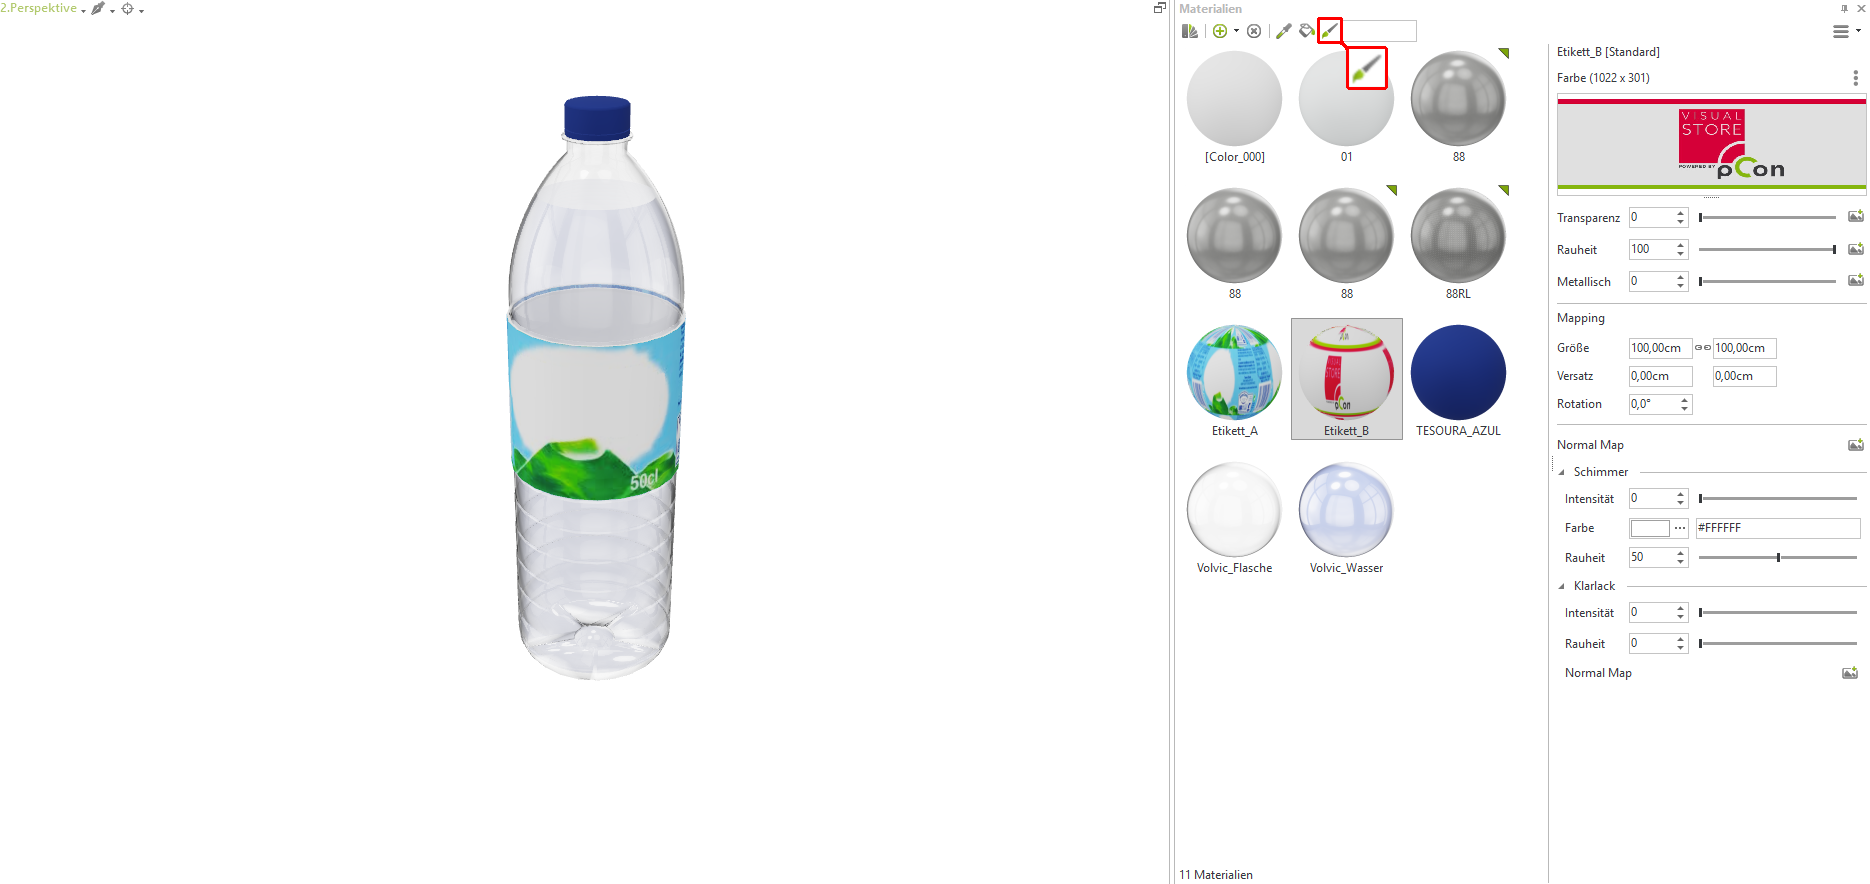
New texture:

Replace the graphic of the duplicated material
After you have saved the graphic in the graphics program, you can now import it.
- In the Material Editor click the Import revised graphic button next to the preview graphic on the right.
- In the dialog that opens, navigate to your revised graphic and then click Open.

Replacing the graphic on the article
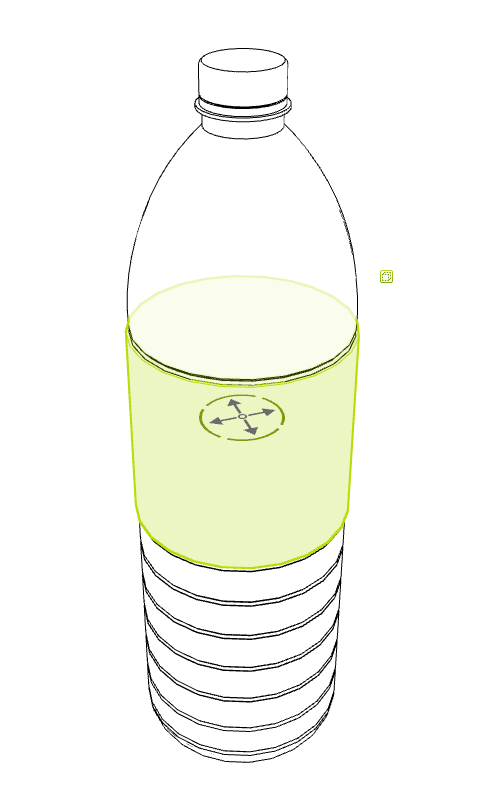
- Select the 3D object in your drawing
- Use CTRL + U to expand the groups until you can click on the label on the 3D object
Putting on the new material
- Select your previously duplicated and revised material in the material editor
- Now click on the icon for assigning (brush icon) the new material
- The existing texture/graphic is then replaced
- Mark the complete article by means of pressed mouse button per frame selection
- Create a new group around the object with CTRL + G
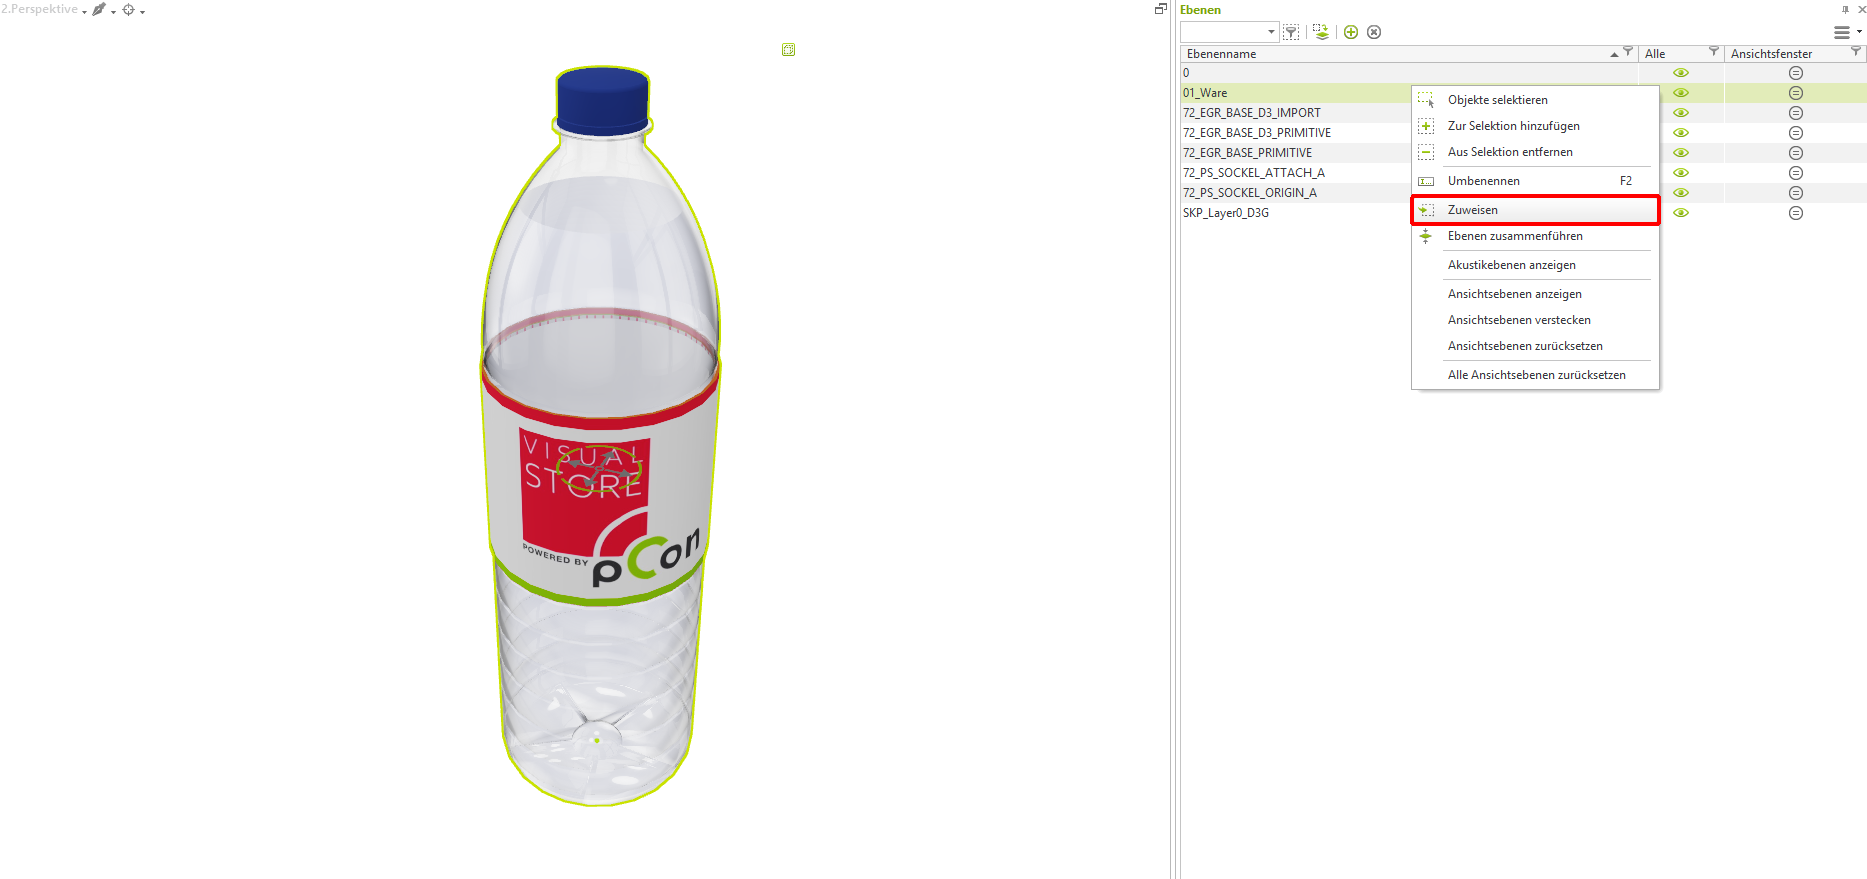
Assign layer (Optional)
- Select your modified article and choose the layers icon on the right side of the toolbar
- You can assign your item to the level by right-clicking on the corresponding level
Following this, you can clean up your drawing to remove any materials that are no longer necessary.
Assign new item information
There are two options for assigning new information or meta information to your articles. These are relevant for the evaluations.
Commercial within visual-Store
Exchange information using the properties window. This information is then only saved for the current plan.