Materials
A material consists of multiple graphics/textures to create the most accurate, true-to-life representation possible. Each graphic has its own specific task.
Material construction
- Texture
- Roughness
- Metallic
- Normal Map/Bump Map
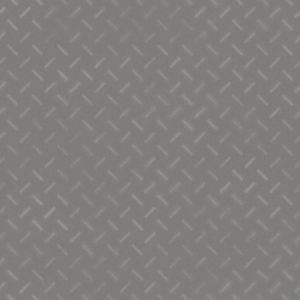
A texture is an image file. This can be a floor, tile, stones, fabric, metal, etc.
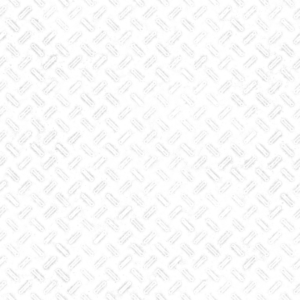
Roughness indicates how rough a surface is. This is done using a black and white image. The darker the area in the image, the smoother the surface. The lighter the areas, the less the surface shines.

Indicates how metallic a surface is. This is also done using a black and white image.
The Normal Map simulates textures. The graphic for this has a blue tone and at edges where it refracts light, it is either green or pink. Based on these colors, the renderer recognizes where the light refracts, thus generating a more realistic representation of the surface.

A very good source for textures is the website www.textures.com. Registration is free, and you get 15 credits per day, which you can use to download textures for free in a resolution of (1024 x 1024 pixels). For higher resolutions, you need premium access.
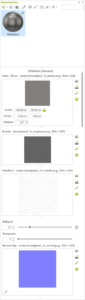
Create a Material
- Click on the Material Editor Top left on the green plus icon
- The new material now appears below
- You can also give this a name, e.g.: Checker plate
- Color / Texture, select the texture using the icon on the left
- Roughness, select the graphic for roughness for your material
- Metallic, if available, select the graphic for metal here
- Normal Map, here you choose your normal