Batch Rendering
With the Batch Rendering Offload render jobs from pCon.planner to an external process. While you continue working in pCon.planner, your images, panoramas, and videos are calculated in the background.
How it works
- External rendering with OSPRay settings
- Calculating multiple views or cameras of a design sequentially
- Usable for photorealistic images, panoramas, and animations
- pCon.planner fully usable during image calculation
Batch rendering uses global visibility settings. If you've hidden an object from the plan in a single viewport, it will still be displayed in the rendered image. To make the object invisible in the image, you must hide it globally: You can do this either in the Start tab, Visibility group; Layer filter: all, or in the Layers dialog.
Using batch rendering for single frames
- Open the Image-dialog Register Presentation)
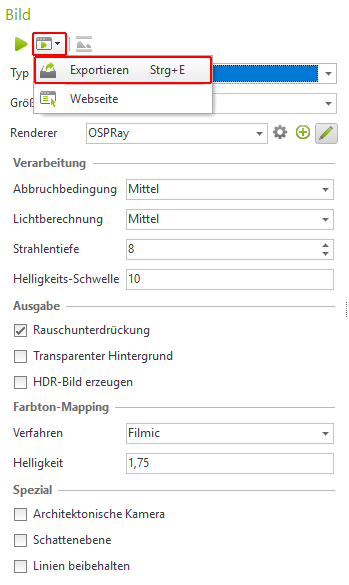
- Place in the Image-dialog Please OSPRay as Renderer one
- Take your settings for rendering in Image-dialog before or choose a Profile
- Select the type – Picture or Panorama
- Click on the Export Button and choose Export
- This opens the window Select views. Select the cameras and views you want to render as a photorealistic image by mouse click
- Click Export. From your exported views and cameras, a Render job created. Image calculation starts in the background
Use batch rendering for animations
Batch rendering can calculate individual images of an animation from pCon.planner.
To create a compressed video, you can use the Avidemux program.
- Open the video dialog (tab Presentation)
- Select the animation you wish to calculate
- Present OSPRay as Renderer one
- Adjust your rendering settings or select a profile
- Click on the Export Button and choose Export
- Batch rendering calculates the individual frames of the animation
- Save individual frames to local directory
- Processing individual frames into a compressed video: Open the first frame of the animation in Avidemux, set the output profile (select a codec, etc.), and save the video
Manage rendering orders in the browser
A new tab will open in your default browser. In it, you can view the progress of image calculation and manage your render jobs.
Note: If you accidentally closed the browser window, reopen it from the Windows taskbar. Click the batch rendering icon.
In the browser, you'll see a list of running and pending render jobs. Here you have the following options:
| Icon | Function |
|---|---|
| The list is in edit mode. It is possible to delete, pause, or stop jobs. | |
| Delete render job. All already completed images from the render job will also be deleted. Deletion cannot be undone. | |
| Stop render job. The render job will be deleted, but rendered images will be kept. | |
| Pause render job. | |
| Continue render job. | |
| The list is in view mode. The order of tasks can be changed. | |
| Left-click on job | In View Mode: Drag and drop jobs in the list up or down to change their order. Jobs are processed from top to bottom. |
Finished images are displayed in a gallery view on the right side of the browser window. After clicking on an individual image, you can view it larger, download it, or delete it. Animations are stored in their own folders and can be downloaded from there.