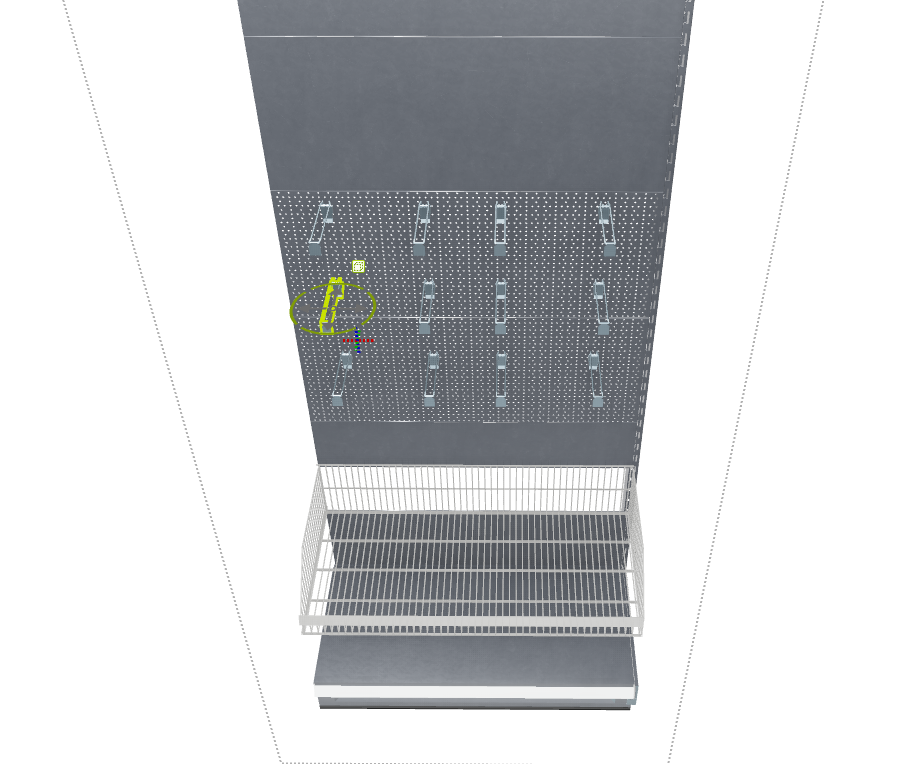
Hook placement
To add items to the hook, the following steps are performed:
1. Hook selection:
To fill the hooks, select the shelf first. You can start populating the desired hook by double-clicking on it. Under the "Store Construction" tab, select "Merchandise Placement," which will open the population window.

2. Read out register data:
If the checkbox is selected, you can read out shelf data with a click and apply the checkmark.
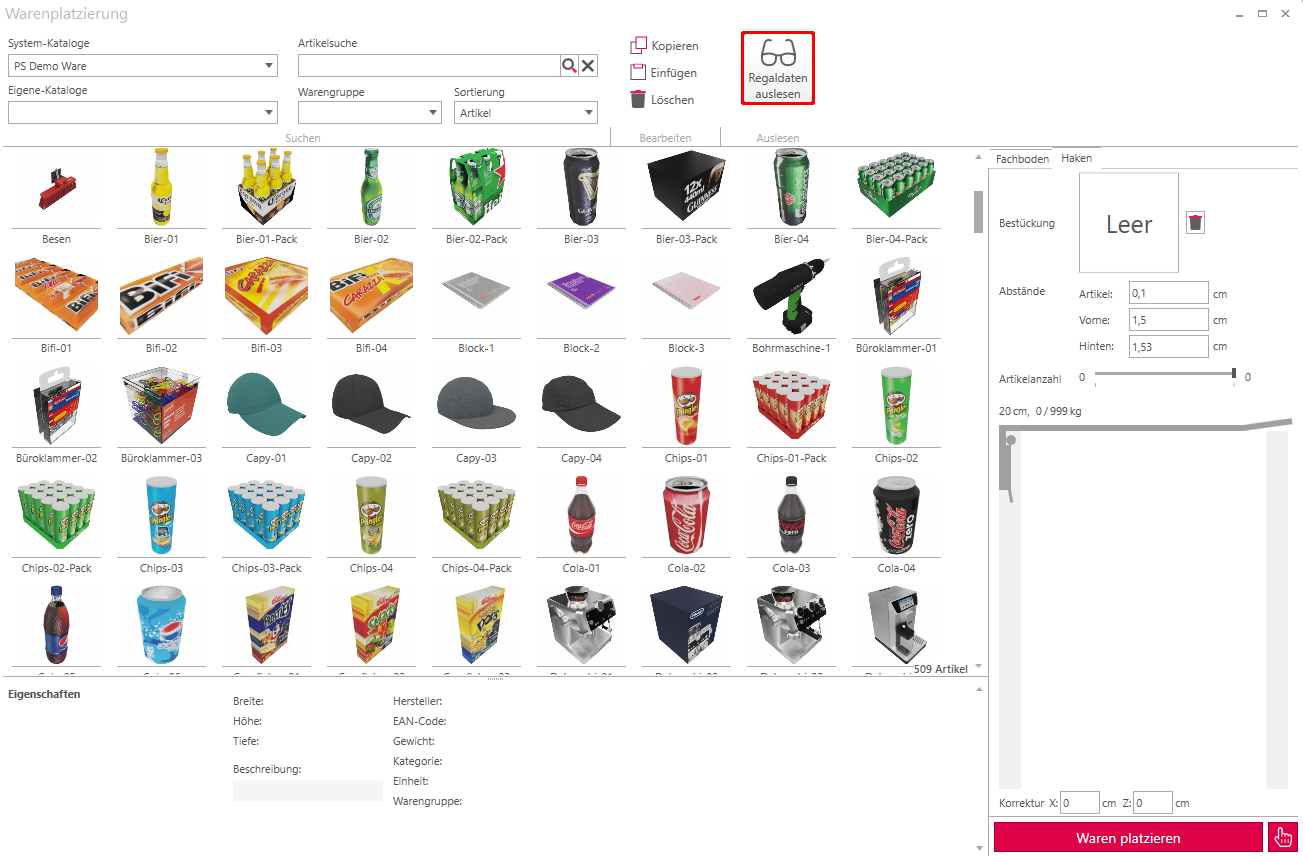
3. Place goods:
The selected object can now be dragged and dropped onto the hook. The entire hook will then be automatically filled with the object.
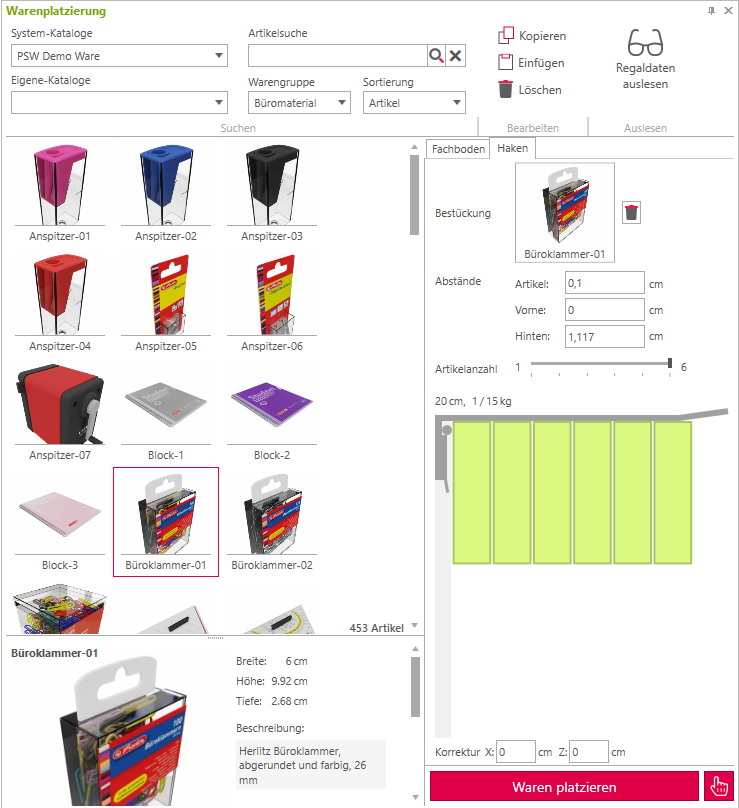
Customizing goods on the hook
About the Spaces Can the goods on the hook be further customized?.
Article: controls the distance between the articles.
Front Distance of the goods from the front end of the hook.
Back Distance of the goods to the shelf.
The slider Number of articles The goods on the hook are regulated by it. It can be adjusted at most so that the goods do not extend beyond the hook. In this example, the item can be stacked side-by-side a maximum of 6 times, otherwise it will exceed the hook.
Delete an object
to delete an object, it is selected by clicking on the rectangle and then by [[ENTF] key or by clicking on the Trash can removed.
4. Place Ware:
By pressing the button Place goods The goods are now placed on the shelf.