Creating articles
- Log In
- Article Acquisition Overview
- Create your own catalog
- Catalog selection
- Editing article data in the catalog module
- Import and export datasets
- Exporting a catalog
- Exporting the datasets to an Excel spreadsheet
Log In
After you launch the catalog tool, you will see the following screen.
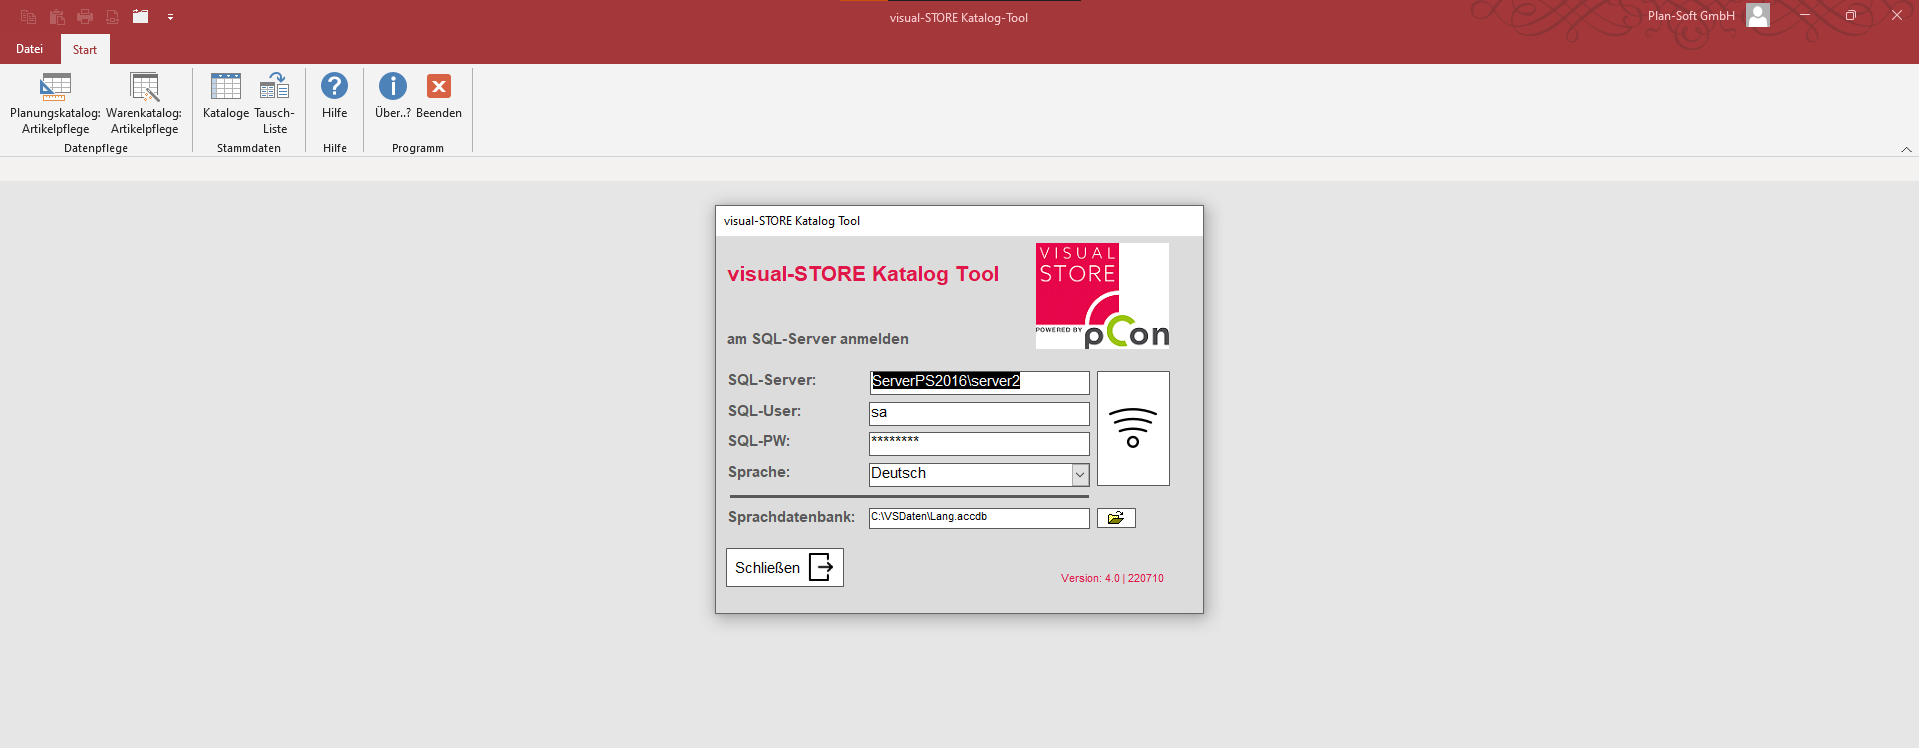
To connect to the database, click the large button next to the input fields.
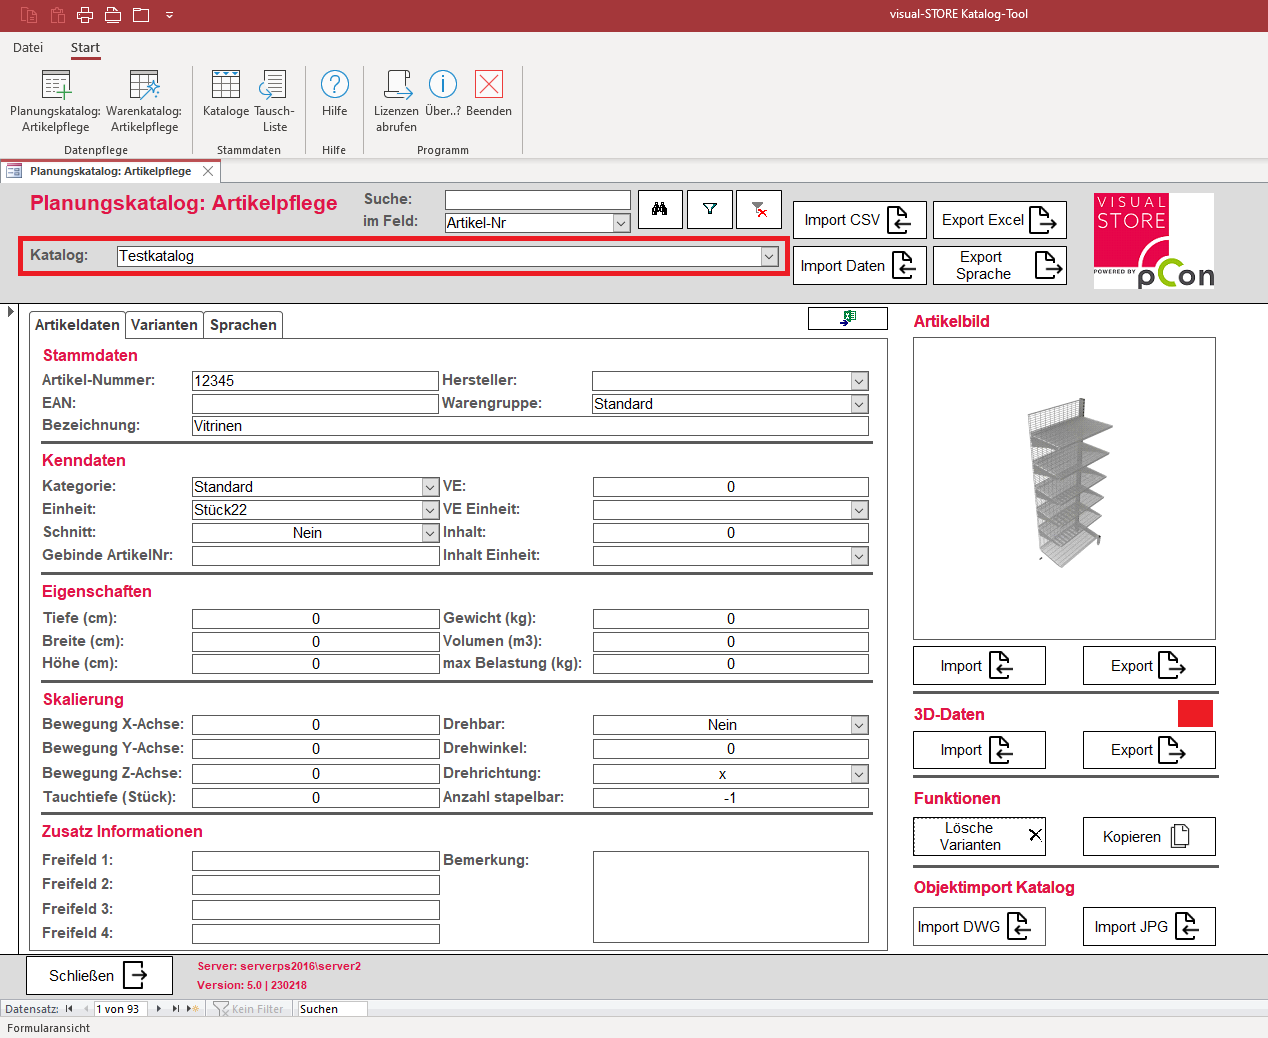
Article Acquisition Overview
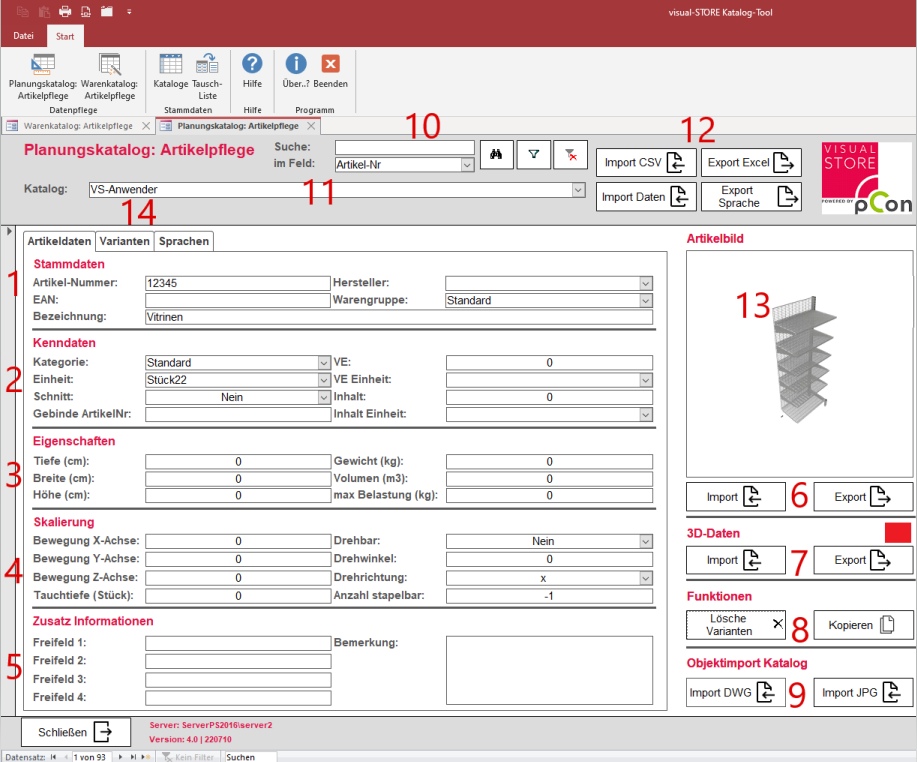
- Input Mask Master Data: Article information can be stored here.
- Product Group: Setting the category in the catalog window under which the item can be filtered. e.g.: Consoles, Footrests, Countertops etc.
- Input mask characteristics: More data will be added here.
- Unit Specifies in which unit the item is available, whether piece or pair.
- Category: This is used for later selecting and editing articles by category in Visual-Store.
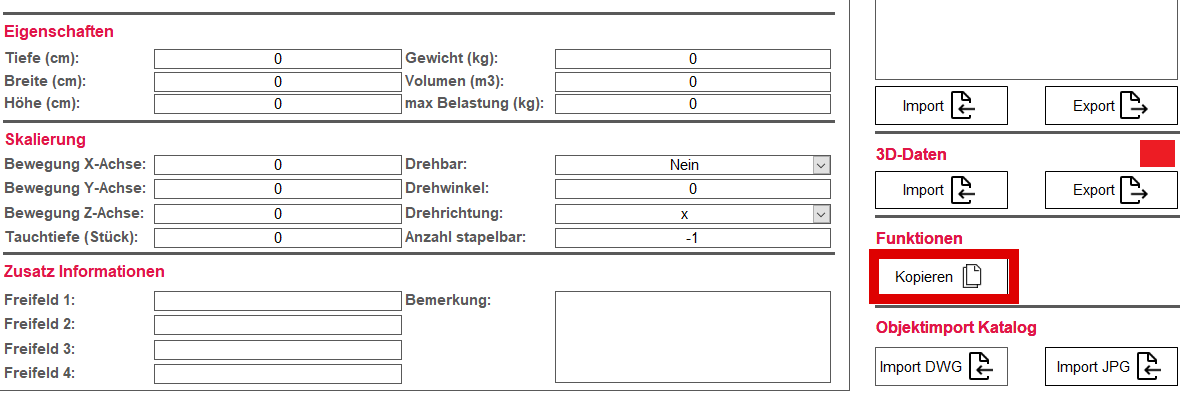
- Input Mask Properties: The properties of the item are stored here.
- Input Mask Scaling
- Movement x, y, z-axis, rotation angle: Here, it can be shown how an object was moved or rotated in the coordinate system.
- Dive depth A property that defines how far an object can be placed into another object.
- Input mask additional information: Additional remarks can be made here.
- Import and Export Image:
- Import: Uploads the desired image (JPG/PNG) from the computer to the database.
- Export Loads the preview image from the database to the computer.
- Importing and Exporting 3D Data:
- Import: Uploading a 3D object to the database.
- Export Download the current 3D object from the database.
- Features
- Delete variants: Deletes all variants of the object.
- Copy: The object is being copied and can be pasted into another catalog.
- Import Objects
- Import DWG Import multiple 3D objects.
- Import JPG Import multiple images to create objects.
- Search function Function for searching and filtering articles in the database.
- Target catalog: Selection of the catalog for importing 3D data or preview images.
- Import / Export Options:
- Import CSV Importing a CSV file that allows multiple records to be imported at once.
- Import Data Import multiple 3D files & preview graphics simultaneously. It is important to ensure that the 3D data and the preview graphics have the same filename as the article number, otherwise the data will not be imported.
- Export Excel Export datasets in an Excel spreadsheet.
- Export Language: Exports a language file to the computer.;
- Article Preview: Displays the imported article preview image.
- Tab Selection:
- Article Data
- Variants
- Color: Here, the color key can be entered, e.g.: 88.
- Description: Description of the color, e.g.: RAL 9006 White Aluminum.
- Price: The article price for the corresponding color can be entered here.
- Standard Setting the default color.
- Languages The name of an article in another language can be specified here.
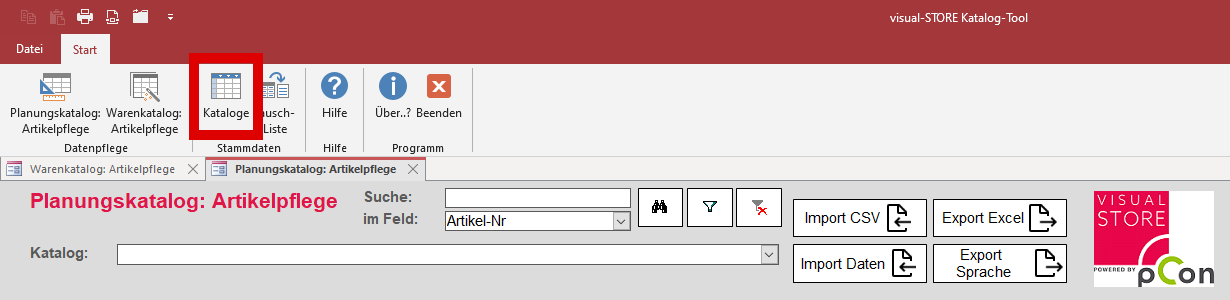
Create your own catalog
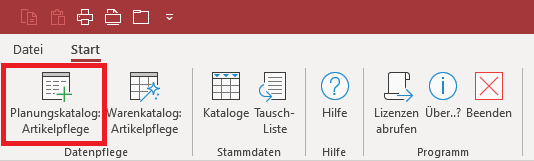
To create a new catalog, click the Catalogs button in the menu at the top.
Upon this, the following window opens.
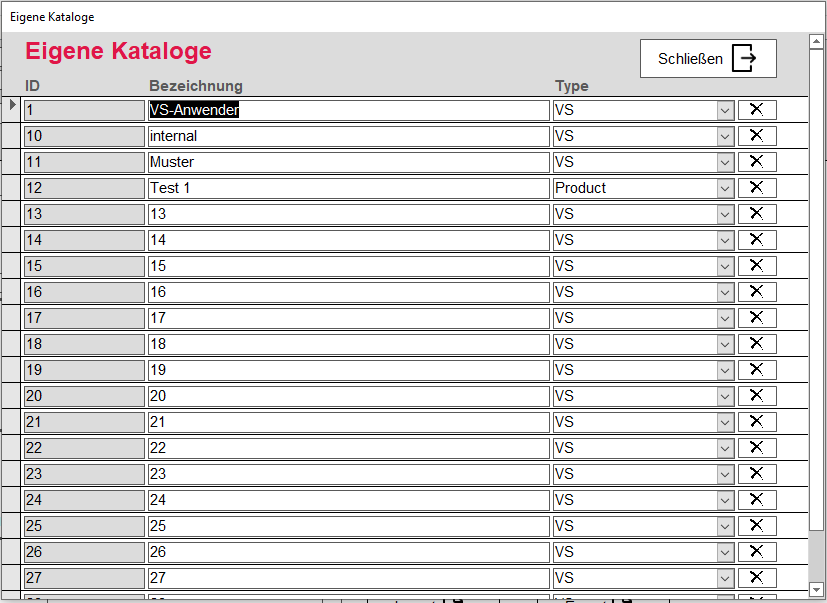
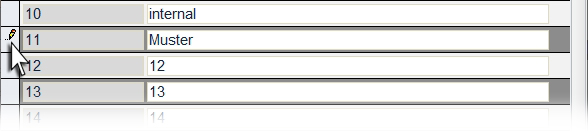
Here you can create up to 21 custom catalogs individually.
To rename a catalog, click in an input field and give it the desired name. Then click on the Pencil icon in the corresponding line to apply the change.
Catalog selection
Click the "Planning Catalog: Article Maintenance" button in the menu at the top.
Now select the catalog.
Editing article data in the catalog module
Creating a dataset
To create a dataset, click the button with the star icon at the bottom of the catalog window.

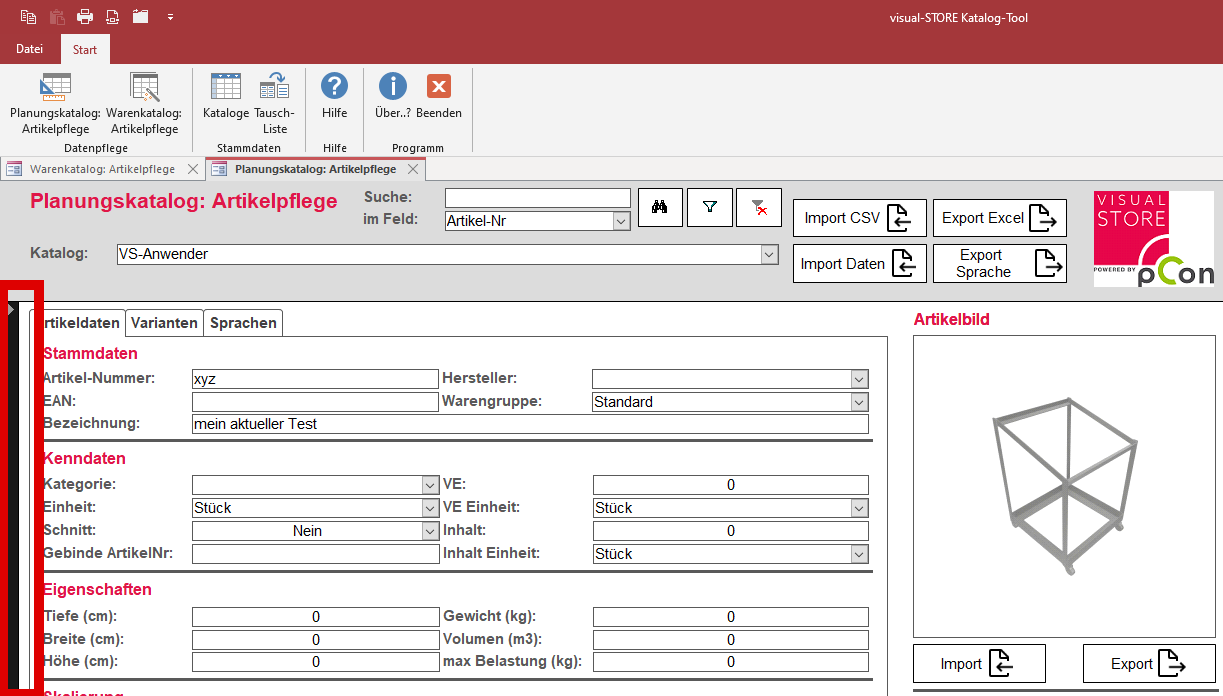
Delete a record
To delete a dataset from the database, click on the left bar (it will then appear black) and then press the [ENTF]-Taste. You will be asked again if you are sure and want to delete the data set.
Copying a dataset
To copy an article, click the button Copy pressed. This can be used to copy any dataset in the catalog to another catalog/dataset.
After pressing, a dialog box opens. Here, by pressing the arrow, the catalog and the desired item in the catalog are selected first.
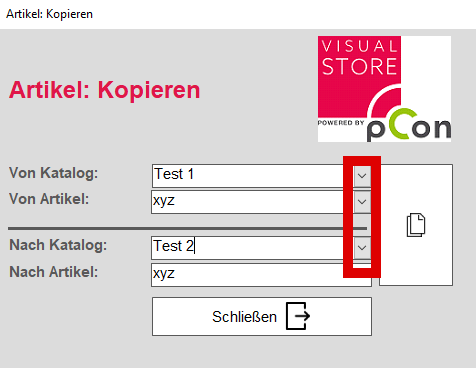
After that, the target catalog and the item to be overwritten can be selected. Finally, press the large button next to the selection fields to complete the copy process.
Importing individual files and graphics into an article
This method is suitable when a component has changed or a dataset is being supplemented.
To import a single image, first select the desired dataset, either by using the search function or by creating a new dataset.
To import a preview graphic, click the Import button and navigate to the desired graphic.
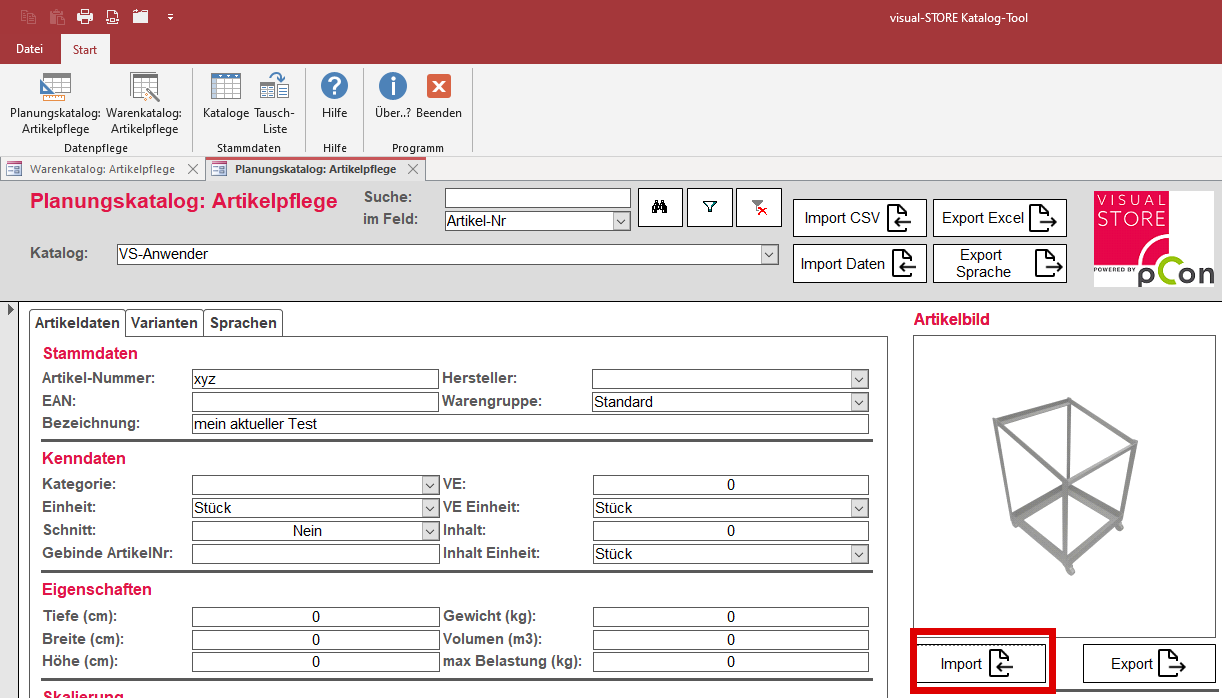
The same applies to importing and exporting a 3D object; use the Import or Export button under 3D data.
Import and export datasets
Importing a CSV file into the database
First, select the desired target directory for the import. CSV file. Then click on Import CSV and navigate to your saved file. Now the information from the CSV file imported into the database.
Import of 3D data and preview images into the catalog
Ensure that the 3D data and preview images have the same name as the item numbers in the database, otherwise the items cannot be imported.
Click in the menu at the top right Import Data, then a window opens, where the Target Catalog and the source folders are set for thumbnails and 3D data.
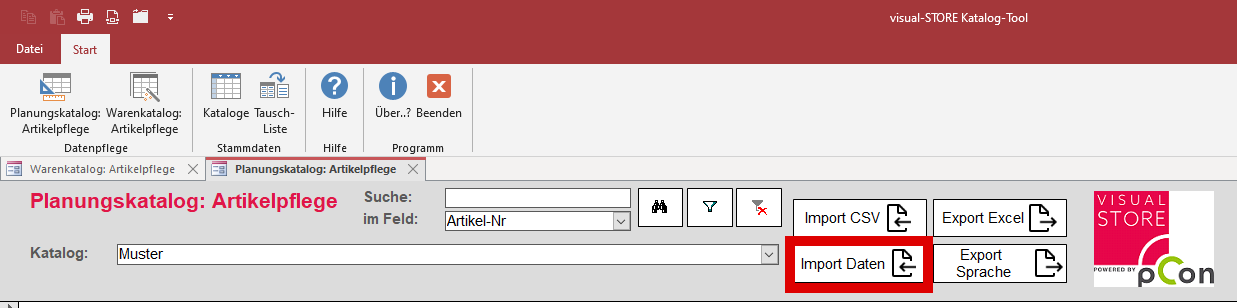
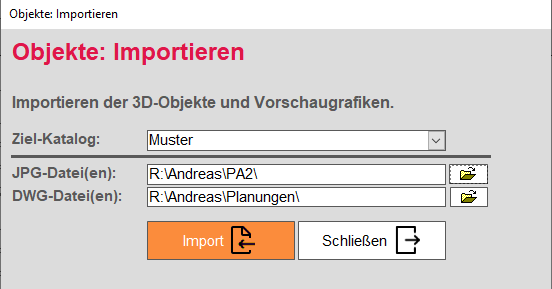
The optimal resolution / image size for thumbnails is 250 x 250 Pixel
After the source folders have been correctly set up, click Import, This starts the import process. A progress bar will be displayed, showing the current status.
After the import is complete, a window will appear showing the number of imported preview images and 3D data. At this point, you can also check if all data has been read correctly.
Exporting a catalog
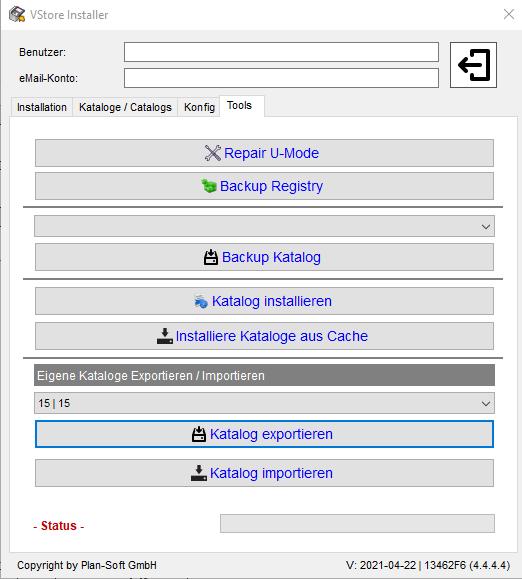
Exporting serves both to create a backup of your catalog and also to share and install this catalog with your employees.
To export a catalog, the VStore_Installer must be opened. This is usually located at C:\VSDaten. In the Tools tab, select the catalog to be exported from the list. Then, click the Export Catalog button and choose the destination folder where the catalog should be saved.
Exporting the datasets to an Excel spreadsheet
Here, you first select the catalog from which you want to export the records. Then, click on Export Excel and choose the location for your table.
